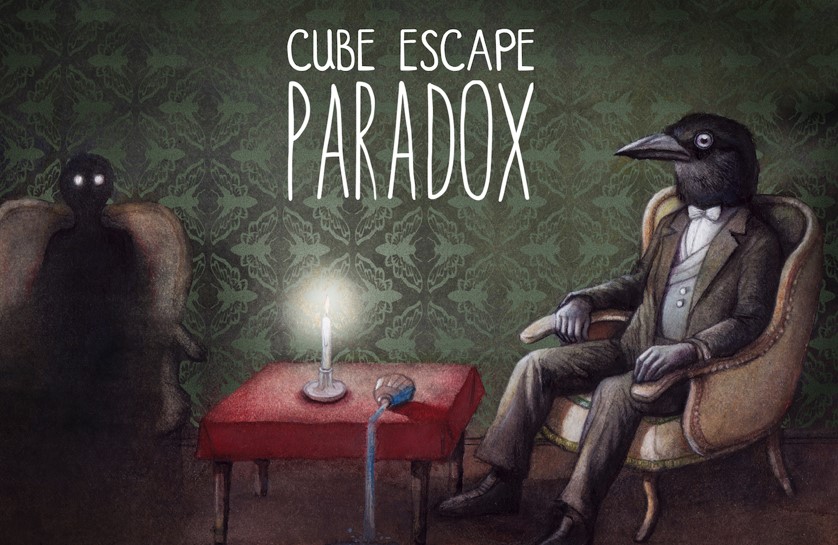
Chapter 2 is unlocked and it has a variety of fun-filled things to perform, including rooms to explore and a few scenarios to visit. You are allowed to use first-person viewpoint to play the game in the 2D environment and your core jobs include finding the hidden items, playing mini-games, and unraveling the truth behind the scenes.
- Chapter 2 Walkthrough
- Room 1
- Room 2
- Achievement Unlocked: A Cup of Coffee
- Achievement Unlocked: Mind of the Past
- Achievement Unlocked: Mind of the Future
- Clock Puzzle (Symbols in the Room)
- Finishing the Statues
- Final Statue Puzzle (Future Mind)
- Correct Order (bottom to top):
- The Final Minds & The Blue Vial
- Achievement Unlocked: The Blue Vial
- Chapter 2 – Achievement Clean-Up
The plot follows a detective who lost his past and found himself in a strange place he isn’t familiar with; so, he is looking for your help to get out of critical situation. During the gameplay, you must visit the present, past, and future mind, as well as navigate the jungle to find clues and try to bring up the detective’s memory.
Chapter 2 Walkthrough
It has two rooms to explore, and each contains a series of items to discover. The objects you collect will be added to your inventory where you can use options like combine, dismantle, use, or analyze for clues.
Room 1
- Start by plugging in the TV.
- Check out the windmill — there’s a puzzle here. Move the squares into the correct positions to match the clue. Solving it gives you a piece of paper.
- Head right and solve the puzzle box again to get another paper.
- Go right once more and pick up the cigar.
- Keep going right. Open the drawers to get a piece of paper and a screwdriver.
- Use the screwdriver to unscrew the light switch and fix it.
- Head right one more time — you’ll see another paper revealed in the light.
Fixing the Photo & New Clues
- Combine the papers to repair the torn photo near the clock.
- Set the TV channel to 945.
- Go to the picture — you can now burn the shadow to reveal a key.
- Use the key to unlock the large cupboard and take the knife.
- Solve the book puzzle to get your Book of Clues.
- Inside the book, grab the photo.
- In the black book, there’s a label painting — take it and place it on the Arles painting.
- Arrange all the items in the correct spots to reveal an ear.
Harvesting the Organs
- Go to the mirror and use the knife to cut out your brain.
- Hand the knife to the red curtain — you’ll get a heart in return (don’t forget to take the knife back).
- You now need to fill the jars with:
- Heart
- Eye
- Ear
- Brain
- Once the jars are full, a label will appear — this gives you your next clue.
- Open the clock drawers to find a fish. Cut it open to get the triangle key.
- The right drawer has a magnifying glass.
- The left drawer contains a telephone book.
Room 2
- Use the magnifying glass on the telephone book to find A. Vanderboom.
- Call the number: 36772.
- Change the TV channel to 412.
- You’ll now need to inspect a few more objects closely using the magnifying glass.
- Keep changing the TV channel to:
- 492
- 879
- 278
- Eventually, you’ll get the globe key. Use it to unlock the globe.
Globe Puzzle
Just like in Chapter 1, you’ll need to follow a specific path on the globe. Here’s the correct route:
Down → Up between the trees → Between the islands and stream → Down (left of theatre) → Right → Down to the big island → Top of island → Up to other island → Right to the windmill → Down → Right → Left of the hotel → End
- Solving it opens the globe and starts a tower defense-style puzzle to unlock the Present Mind.
Present Mind Walkthrough
- Insert the Present Mind into your head.
- Sit in the chairs with Mr. Crow.
- Check the book on the floor — you’ll find a cassette tape and a seed.
- Take the cup that Mr. Crow hands you.
- Play the cassette tape.
- Open the projector to get some oil.
- Use the oil to fill the coffee machine and light it with your cigar.
- Fill your cup with water from the dispenser above.
- Plant your seed, water it, and keep clicking to grow coffee beans.
- Grind the beans at the windmill.
- Fill the machine with more water and brew the coffee.
- Serve the fresh coffee to Mr. Crow.
Achievement Unlocked: A Cup of Coffee
Spilled Clues & Safe Puzzle
- After Mr. Crow spits the coffee out onto the book, combine the book and cassette tape to get a safe code:
- Triangle, Square, T, I, S
- Open the safe and grab the lightbulb.
- Insert the bulb into the machine next to Mr. Crow.
- Solve the image puzzle by placing each picture in the correct slot.
- Take the psychological file and the Mind of the Past.
Achievement Unlocked: Mind of the Past
Past Mind Walkthrough
- Swap to the Past Mind.
- Rearrange all the banners into either number or symbol order.
- Look up Eilander D in the phone book and call: 57671.
- Look through these locations:
- Front door keyhole
- Red curtain
- Mirror
- Globe
- Skull
- TV (use code 369, from parents)
- Changing screen
- Present location
- Collect the newspaper article.
- Back out of the puzzle box to see symbols on nearby objects. Use this info to solve the box:
- Top: Cupboard
- Left: TV
- Right: Clock
- Bottom: Mirror
- Take the Mind of the Future.
Achievement Unlocked: Mind of the Future
Collecting the Statues (Future Mind)
- Swap to the Future Mind.
- Sit with Laura in the chairs.
- Look at the table — pick up a letter, seal, and flyer.
- Reseal the letter to take it with you.
- Remove your brain, give the letter to the curtain — receive the Owl Statue.
- Unlock the drawer with the key and get the film tape.
- Play it on the projector, click the glowing part, and fix the film.
- Pull down the screen and match the outlines.
- Move the picture to find the Corrupted Statue and Funeral Card.
- Place all the photos in the black book.
- Change the TV channel to 207.
- Follow the eyes around the screen to unlock the Woman Statue.
Clock Puzzle (Symbols in the Room)
You’ll notice symbols on the window and deer. Based on their positions:
- Deer is at 12
- Window is at 6
So set the clock to 11:45 and then 3:00.
- Grab the Sugar Cube and Silver Coin.
Finishing the Statues
- Switch to the Past, return to the Present, and place the Silver Coin on the box.
- Take the Man Statue.
- Switch back to the Present and give the Sugar Cube to Mr. Crow for the Crow Statue.
Final Statue Puzzle (Future Mind)
- Go to Laura.
- Place all four statues on the table — none of them should be in line with each other.
Correct Order (bottom to top):
- Crow – 1st spot
- Owl – 3rd spot
- Man – 5th spot
- Lady – 2nd spot
- Open the safe with the code:
Triangle with dot, Hourglass, S, T, I - Play the cassette tape and rewind it.
- Go back to Laura, you’ll see Harvey. Click on him twice.
- Look up Johnsson J.D.E. and call: 54253.
- Pick up the bird food and feed Harvey.
- Take the egg.
The Final Minds & The Blue Vial
- Remove your brain again.
- Give the egg to the curtain man.
- Cut open his head and place the minds inside:
- Present Mind —> gives Wooden Cube
- Past Mind —> gives Iron Cube
- Future Mind —> gives Glass Cube
You’ll need the correct cube order from the film:
Wood – Glass – Iron
- Take the Blue Vial.
- Use the magnifier to find the code.
- Go to the mirror and drink the vial.
Achievement Unlocked: The Blue Vial
Moth Puzzle & Final Door
- Find and click the moth in each room to get a key.
- Use it to unlock the front door and leave.
Forest Puzzle – Final Map
Follow the arrows as directed:
- Start
- Knife
- Rock Clue + Man
- Statue
- Statue
- Statue
- Achievement
- End
Achievement: Movie Dale
Find your movie self and click to the end.
Chapter 2 – Achievement Clean-Up
If you don’t want to explore freely, go straight to the TV and safe.
1st Achievement: A New Tie
- Find 5 symbols from:
- TV
- Wooden Block
- Book
- Painting
- Harvey’s Cage
- Open the safe:
Triangle, Arrow, Spiral, Arrow, Spiral - Pick up the Tie and wear it.
2nd Achievement: A Bit Fishy
- Change clock to 8:05 for a key.
- Unlock cupboard for Shrimp Cocktail.
- Give it to the Curtain Man.
3rd Achievement: Another Ending
- Count:
- Coasters on table
- Glasses in globe
- Jars on shelf
- Change TV channel to 465.
4th Achievement: A Phone Call
- Add up numbers from:
- Flyer
- Iron Cube
- “J” Jar
- Call: 77772
- Find and call Leijenhorst Van S: 15334
5th Achievement: The Great Northern Hotel
- Find the keychain in the globe
- Change TV channel to 315
Extra TV Code
At the end, enter TV code 726
Achievement: The Right Place
Find the skull channel.
Endgame Puzzle – Paradise
- Final symbol code:
S, Arrow, Envelope, Spiral, Circle - Take the Mask and wear it.
Achievement: Paradise
- Now input the final Achievement Code:
Hourglass, Envelope, I, Triangle, Circle - Take the Diamond Eyes and Golden Cube
- Place the eyes into the skull
- Hand over the cube
Final Achievement: Dale’s Journey Continues


