
In A Diary of Darkness, you step into the role of a mother desperately searching for her missing son in a haunted house filled with secrets, puzzles, and eerie clues. The journey takes place across multiple interconnected rooms, each hiding critical objects, symbols, and mini-games. As you progress, solving these mysteries brings you closer to the truth behind the disappearance. This guide covers everything from start to finish, helping you navigate the game’s challenges in the most efficient way possible.
- A Diary of Darkness Walkthrough
- Room 1 – The Beginning
- Room 2 – Study Room
- Room 3 – Time Puzzle and Cupboard Clues
- Room 4 – Alchemy and Jar Puzzle
- Back to Room 2 – Revealing the Curtain Clue
- Room 5 – TV Lounge and Vaults
- Room 1 – Candle Ritual and Mirror Puzzle
- Room 2 & 3 – Completing the Painting and Gathering Clues
- Final Puzzle – Mirror, Radio, Vaults, and Horn
- The Final Key and the Ending
A Diary of Darkness Walkthrough
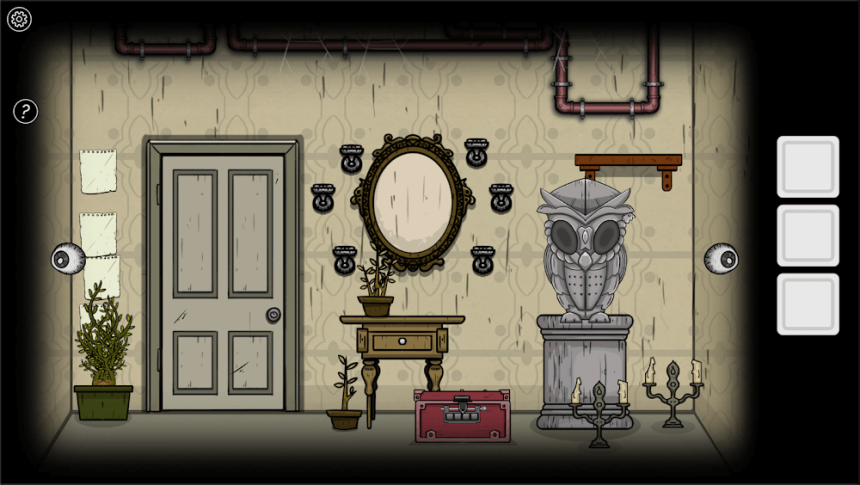
Room 1 – The Beginning
You begin your investigation in Room 1, surrounded by eerie signs, a broken mirror leaking blood, dusty tables, storage boxes, and a few suspicious decorative elements. Start by tapping the damaged front wall on the left to discover a Crowbar. Then, inspect the plant pot to collect a Leaf and a Handle.
Move to the storage boxes, play a jigsaw mini-game, and complete the image to unlock the box and obtain a Candle. Next, inspect the right-side cabinet, input the combination (3, 7, 1, 8, 5, 6, 2, 4, 9) to open it, and take the Paper Cutter.
Approach the table on the right and place the candle in the first cup. Then, check underneath the table, on the last cup to the right, you’ll find a Key. With the key in hand, you’re ready to move on to the next room.
Room 2 – Study Room
Tap the eye icon on the right to reach Room 2, which contains a window, bookshelf, and sofa. Use the Key to unlock the table drawer and collect a Second Handle and a Pot.
Next, inspect the curtain rod, you’ll find the Third Handle on its left. On the bookshelf stand, grab a Toothed Gear and a book titled I.A.R.Y. Be sure to also note the paper clue lying nearby. After observing the painting on the wall, proceed to the next room.
Room 3 – Time Puzzle and Cupboard Clues
Once in Room 3, observe the drawing on the right wall. Use the Paper Cutter to slice the drawing and reveal the time 7:15. Then, examine the painting between the clock and cupboard to find another Toothed Gear behind it.
Pick up the Key near the telephone receiver, and add a Matchbox to your inventory. Head to the cupboard and inspect all three cabinets:
- Top – Screwdriver
- Middle – Finger
- Bottom – Flask
Use the Screwdriver to open the clock, and place the gear inside. Next, tap the drawer on the left of the clock and use the painting above it to input the correct code, retrieving a Piece of Cloth. Don’t forget to grab the Candle behind the plant pot above the cupboard before leaving.
Room 4 – Alchemy and Jar Puzzle
Proceed to Room 4 via the right eye, and inspect the pipe to collect a Valve Handle. At the cupboard, install all collected handles and adjust them as follows:
- 1st – Up
- 2nd – Right
- 3rd – Left
- 4th – Down
Unlocking the cabinet reveals a Jar with a Heart. Tap it repeatedly to break it and retrieve the heart. Below the stove, collect another Pot, then place it on the burner. Pour in Water from the Jar, followed by the Leaf, Heart, and Finger. Light the stove and place another Candle between the two pillars.
After brewing the solution, use the Flask to collect it. Inspect the painting on the wall for a small symbol used in a later puzzle, and collect another Toothed Gear and Paper Piece from behind the pipe. Use a Key to unlock the left storage cabinet, revealing another Paper Piece.
Back to Room 2 – Revealing the Curtain Clue
Return to Room 2 and hang the Piece of Cloth over the rod to form a curtain. Tap it to reveal a clue in red ink and collect a Candle hidden behind the curtain on the right. Now that you’ve gathered all necessary pieces, head back to Room 4.
Use the red ink clue to unlock the right storage cabinet with the code W, 8, e, 3, obtaining a Key. Use the Hook to extract another Key from inside a ship model, and grab a third key hidden behind the stand. Before leaving, open the second-last cabinet to discover clues in vertical lines. Use the Key to unlock the top-left cupboard section to retrieve Electrical Tape.
Room 5 – TV Lounge and Vaults
Tap the eye icon again to enter Room 5, featuring a TV, Vault, and Radio. Start by fixing the TV wire with the Electrical Tape. In your book, place the missing paper on page 24 to discover two shapes. Tune the TV accordingly, then break the screen to find a hidden object.
Investigate the cupboard and retrieve a Missing Paper. Open the first box using the previously noted vertical line clue (Up, Down, Up, Up, Down, Up, Down, Down) to collect another Candle, a Toothed Gear, and Scissors. Return to Room 1.
Room 1 – Candle Ritual and Mirror Puzzle
Now back in Room 1, place all candles into the cups on the table and use the Matchbox to light them individually. Tap the cabinet on the left and input the shapes seen earlier in paintings (Sun, Double Tree, Height, Hook) to collect another Paper Piece.
Room 2 & 3 – Completing the Painting and Gathering Clues
With the Scissors, cut open the sofa in Room 2 to retrieve a Paper Piece, then return to the painting above the sofa, placing the pieces to complete the frame.
Move to Room 3 to unlock the lower cupboard sections using your keys and collect two more clue papers. Return to Room 2 again to complete the final painting, which reveals a set of geometric clues.
Final Puzzle – Mirror, Radio, Vaults, and Horn
Return to Room 1, where the candles are still burning. Select the Mirror Pieces and fix them in place. Then, pour the Red Liquid from the bottle onto the mirror. After a short animation, a set of numbers appears—25.43.
Return to Room 5 and tune the Radio to match the clue. This gives you the code 5763, which you enter into the vault below the radio to retrieve another Paper Piece. Use it in the book.
Now, look above the TV, where a second vault appears. Enter the symbol code (6, 69, 2, Hat) to unlock it and receive a Horn Half.
Go to Room 3 and fix the Clock by adding the final Toothed Gears and adjusting it to 7:45. The clock reveals a hidden compartment containing the second half of the Horn.
The Final Key and the Ending
With both horn halves in your possession, return to the Kitchen (Room 4) and place them on the animal skull above the stove. It gives you the Final Key.
Make your way back to Room 1, select the Final Key from your inventory, and use it on the locked door.
Once the door opens, the game concludes, revealing the truth behind the mystery and the mother’s terrifying journey to find her missing son.


