

Welcome to the Find Joe Lumen Chapter 2 Walkthrough which is about a virus outbreak, invented by a robot, has nearly brought the humanity at the brink of destruction. You are the last hope and must jump in to help Mike and his friend Lumen survive longer, as well as defeat the evil robots to save the humanity.
Find Joe Lumen Walkthrough – Chapter 2 (Level 1 to 15)
This guide helps you complete all tricky levels of Chapter 2 in Find Joe Lumen. Below, we have arranged a guide in levels so you can find them easily.
Level 1 Bunker – Part 1
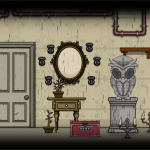
First off, approach the puzzle located on the right side. Use the magnets on the sides to arrange the puzzle pieces exactly like in the picture above. Press the button on each magnet to activate it and attract the puzzle pieces. Once the robot image is complete, tap on the robot.
Next, use a scalpel to open the box nearby. Take the paper inside and add it to your inventory. Place the can opener on the machine’s track to open the door. Tap on the green signal on the machine, then proceed deeper into the bunker.
Take the can opener with you. Open the shoebox on the left that contains the blue shoe. Turn the blue shoe to see the number 11 and tap on it.
Pick up the table leg from the large box on the right and add it to your inventory. Remove the wooden boards on the right to reveal a footprint. Tap on the footprint.
Move a section of the floor to uncover a hidden compartment and tap on the amulet inside. Enter the room on the left, which is the bunker’s warehouse. Approach the typewriter and place the paper from your inventory into it.
Move the lever on the right to raise the paper upwards. Type the letter “S” by tapping on the “S” key on the keyboard. Press the tabulator key to return the paper to the middle.
Move the lever again to raise the paper slightly. Type the letter “S” once more so that the upper end of the first “S” and the lower end of the second “S” overlap, creating the symbol you need. Tap on the symbol.
Move the box on the left to reveal a can of fish food. Take a closer look at the can. Use the can opener from your inventory to open the can, then tap on the fish inside.
Take the second table leg from the floor. Approach the coat on the right and pull the pencil from its pocket to see it better, then tap on the pencil.
Return to the first area of the bunker. Look up at the ceiling where cracks form the shape of a triangle and tap on that triangular surface.
Attach the two table legs from your inventory to the table and tap on the fixed table. Once all clues are found, proceed to the second corridor of the bunker and press the elevator button.
Level 2 Bunker – Part 2
First off, you must find the red button on the floor and put it on the board near the elevator to fix it there. Tap the button to access the living room.
When you are in the elevator, discover the drawing glued on the left side wall, then go to the living room. Remove the seat available on your right side. After that, find and bring the empty toolbox out and put it on the ground.
Next, place the toolbox lid that’s already on the ground onto the toolbox and tap it. Approach the screen and wait for scientist Robin to cough so you can see his wristwatch. Tap on the wristwatch before he moves his hand. If you miss it, wait for another cough.
Now, go to the buttons on the left side and read the numbers above them. Press the buttons in the correct sequence. When the ceiling lights turn on, tap on them. Open the floor lid on the left and take the triangle button. It will be added to your inventory.
Return to the elevator and place the triangle button in its spot. Press it to go to the radio room. Enter the radio room, move the stick towards the elevator, and approach the radio on the left. Change the frequency to 240 MHz, as Mike suggested, then turn on the radio to contact Lumen.
After the conversation, move the box on the ground to reveal the next elevator button. Pick it up and approach the quiz machine.
Answer the four quiz questions by picking one of the four possible answers. Some answers are in the pictures of this guide. Once you answer all correctly, an image will appear on the screen. Tap on it.
Return to the elevator and use the stick you moved earlier to open the ceiling panel. Move the money behind it so it drops to the ground and tap on the money. Place the square button in the elevator and press it to go to the control room.
Enter the control room and press the button on the left to turn on the lights. Move the chair and tap on the magnifier on the chair seat. Move the chair back so you can see the screen on the right. Approach the screen.
On the monitor, you will see a theater and Lumen. Tap on Lumen. Return to the radio room, move the camera to look at the airplane poster, and use the tape from the right table to fix the camera. Go back to the control room and look at one of the central monitors. Tap on the airplane poster.
Take a closer look at the mug on the left side of the room. Turn the mug around and tap on the eyes. Once you find all the clues, check the left monitor. Go to the radio room and pick up the key from the floor.
Return to the control room and use the key to unlock the drawer. Check the notes to see Robin’s patrol schedule. He changes rooms every half hour.
When you start looking at the schedule, it is 10:00. Next, Robin will visit the radio room at 10:30. Set the alarm clock to 10:30 and press “Set.” Finally, go to the radio room to meet Robin.
Level 3 – Abandoned Mall
First off, you should drag the screwdriver handle from behind the staircase and pick it up from there. Next, tap the switch to open the ceiling windows and wait for the bird to appear.
Once the bird shows up, tap on it and head to the toy store located on your left side. There, interact with the Sheriff doll by tapping the heart badge to activate it.
After the doll starts singing, tap on the music notes that appear. Then, move the box nearby to reveal a rabbit plushie and tap on it.
Use the scalpel held by the robot to deflate the ball, which will uncover a hidden key. Pick up the key, and it will be added to your inventory.
Next, move the toys in the middle of the store to find a toy car and tap on it. Then, approach the arcade game machine and hold the red button to accelerate your car.
Be sure to keep the button pressed until the end of the game while moving it left and right to switch lanes. Avoid hitting other vehicles, or you’ll have to restart. Don’t forget to collect fuel containers to keep going until you reach the finish line and win the game.
When you win, the machine will print out a ticket, tap on the ticket to collect it. Use the key you found earlier to unlock a room in the mall’s hallway and enter the dressing room.
Inside, attach the mannequin’s head and then move the mannequin to the left so it faces the mirror. Tap on the mannequin’s head as seen in the mirror’s reflection.
After that, remove the red curtain and take the spray paint; it will be added to your inventory. Place the closet rod inside the wardrobe and hang the hanger on it.
Move the shirts scattered on the floor until you find a t-shirt with a palm tree pattern. Hang that shirt on the hanger and tap on it. Don’t forget to tap the wallet on the board nearby.
There is a building brick next to the sofa. Move it to the left to reveal it fully and pick it up to add it to your inventory. Head back to the toy store and approach the building bricks on the floor.
Place the building brick you found to start the puzzle challenge. Attach the bricks to form a house shape like the picture above, and once complete, tap on the house.
In the mall’s hallway, use the spray paint to leave the letter “R” on the wall, then tap on the word “RUN.” Once all clues are found, the electricity will go out, trapping Lumen inside.
Approach the electrical box and use the wires to connect the red contacts with the blue contacts to restore the power.
Level 4
First, approach the table and start assembling the photograph with the pieces you already have. You’ll need a few more pieces to finish it, which you’ll find by the end of the level.
Next, head over to the blue box on the ground. Place the numbers on the triangle so that each side adds up to 17. For example, the left side could be 2 + 8 + 4 + 3 = 17. When you complete the puzzle, tap on the watch inside the box.
Pull up the spring from the sofa and tap on it. Look under the TV to find a lightbulb, then place the lightbulb into the pendant light above.
Go to the garage and turn on the light by flipping the switch. Tap on the scoop nearby. Remove the clock to reveal a car key hanging on the wall—take it into your inventory.
Then, head to the attic and move the stone to uncover a doll. Take the doll once it falls to the ground, then go back to the garage.
From the box on the right, grab the screwdriver shaft. In your inventory, merge it with the screwdriver handle to create a complete screwdriver.
Use the screwdriver on the screw to drop a green spider plushie to the floor, then tap on the spider. Use a broom to sweep away the spiderweb covering a crack in the wall. Inside the crack, you’ll find a chest—move it slightly and tap on it.
Take the windshield washer fluid inside; it will be added to your inventory. Open the car hood and approach the vehicle. Tap on the wrench on the left side.
Open the container on the right and pour the windshield washer fluid inside it. Next, open the cupboard on the left and grab the fishing line.
Place the car jack under the car and use it to lift the vehicle. Move the ball underneath the car—once it’s no longer blocking the space, tap on the ball. Use the car key from your inventory to enter the car.
Activate the windshield, then tap on the “SEB” graffiti visible on the wall from inside the car.
After gathering all the clues, head to the living room and talk to Seb.
When the conversation ends, take the photo pieces from his hand and approach the table. Place the remaining pieces on the table and finish assembling the photograph.
Level 5
First, speak with Mike’s boss. He will invite Mike to play a game he invented. Your piece is green, and you need to capture the boss’s red piece. Each time you move your piece to an adjacent node, the boss will move his piece trying to get away from you.
Follow the numbered sequence in the picture above to win the game. After winning, tap on the cup the boss offers you as a reward.
Next, move the box to reveal one of Robin’s notes on the wall and pick it up. Carry the water container into the kitchen, then head to the food stall.
Open the display case, move the potato, and tap on the piece of bread. Check the phone nearby. Although it’s out of order, Mike will explain more about the bunker’s phones.
Go to the kitchen and open the oven. Tap on the fish skeleton inside. Place the water container under the faucet on the left, then put the teapot below the faucet to fill it with water. Once the teapot is full, place it on the stove. When the water boils, tap on the teapot.
Move the kitchen pan to the side to reveal the second Robin’s note and pick it up. Then, pick the third note hanging on the left wall. Open the drawer and take the basil seeds, which will be added to your inventory. Tap on the ceramic tile near the phone to enter the greenhouse.
Inside the greenhouse, take the fourth Robin’s note in the left corner. All of Robin’s notes will count as one item in your inventory. Approach the plants and open the display case. Tap on the ladybug you find there.
Plant the basil seeds, then turn the valve to activate the watering system. Once the basil has grown, tap on it.
Approach the phone inside the greenhouse and remember the number you see—you’ll need to call it later.
Speak with Robin and give him all of his notes. Tap on the book he gives you afterward.
Return to the kitchen and approach the phone. Call the number “2912.” After that, go to the safe on the left side of the kitchen.
Place the chips as shown in the picture above to unlock the safe, then tap on the vial inside. Go back to the greenhouse and tap on the missed call icon on the phone there.
Once you have all the clues, head to the garden. Program the robot by placing the sequence of movements to harvest a tomato and return to the starting point. The solution is in the picture above: 1 up, 1 left, 1 up, 1 right, 3 up, 1 right, harvest (scissors icon), 1 left, 5 down.
Level 6
First off, open the bag on the floating box and read the book inside. Next, head to the bush on the left to find a pair of scissors. Move the scissors to see them clearly, then take them. They will be added to your inventory.
Rebuild the sign above the cabin’s door by collecting parts from near the bush and the sail. Once completed, tap on the sign.
Remove the sacks from the ship and place them near the cabin. As you remove the last sack, the boat will rise slightly, revealing its name completely. Tap on the name “MARY.”
Approach the cabin’s window and remove the lid. Then tap on the mark on the wall. Take the crowbar from the boat and add it to your inventory. Enter the cabin afterward.
Inside, pick up the fishing rod handle. In your inventory, combine the fishing rod handle with the fishing line to assemble a complete fishing rod.
Look in the pocket of a coat and move the magnet upwards to see it clearly. Take the magnet and add it to your inventory. Also, take the flag cloth resting on the chair.
Beneath the table, move the wallet aside and examine it closely. Tap on the 5-cent coin on the right side of the wallet.
Find the wooden bar lying on the floor and place it on the safe near the window. Approach the safe and set the four symbols as shown in the picture above to unlock it.
Tap on the bomb inside the safe. Use the crowbar from your inventory to remove the board from the floor. Tap on the object hidden beneath the board, then approach the table.
Lower the lock on the left to lift the lantern’s glass. Use the scissors from your inventory to cut away the burnt fuel cell.
Turn the wheel on the right to raise a new fuel cell. Use the matches next to the lantern to ignite the fuel cell by dragging and holding your finger on it. Finally, use the lock mechanism to secure the glass back in place.
Tap on the shining lantern to confirm it’s lit. Exit the cabin and move the wooden pole you recently moved near the window. Place the pole at the sail.
Raise the flag you took earlier by attaching it to the pole, then tap on the flag. Place the fishing rod in the holder on the left side. Once the fish bites the bait, pull the bait upwards and tap on the caught fish.
Finally, use the fuel can near the cabin to refuel the boat once you’ve found all the clues.


