

Unsolved Case is a series of over 10 games and each has a unique well-written storyline to unfold and mysteries to solve. If you have dream of, be a detective, the game gives you an opportunity to adapt the career as a detective and start dealing with a web of lies. There is a fascinating investigation journey you must embark on to find a variety of hidden objects and play mini-game to reveal secrets.
There is a new case of an architecture firm employee who has been removed from the organization in the Central Park. Now, your job is to find clues, combine items, and find the suspect to bring them to justice. For that, you can read Unsolved Case: Fatal Case Walkthrough guide to find solutions and their answers.
Unsolved Case – Fatal Case Walkthrough Solution
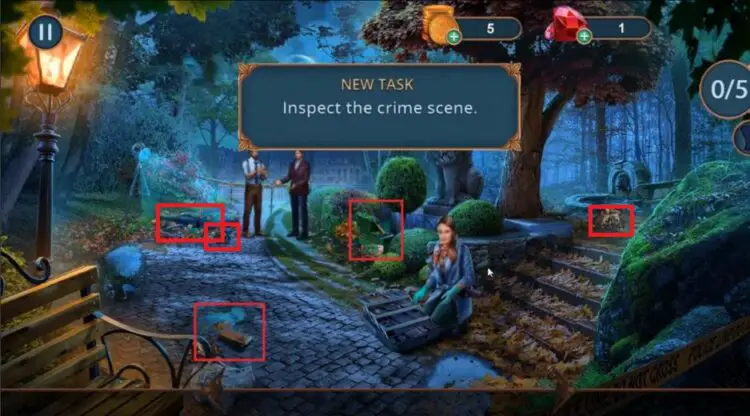
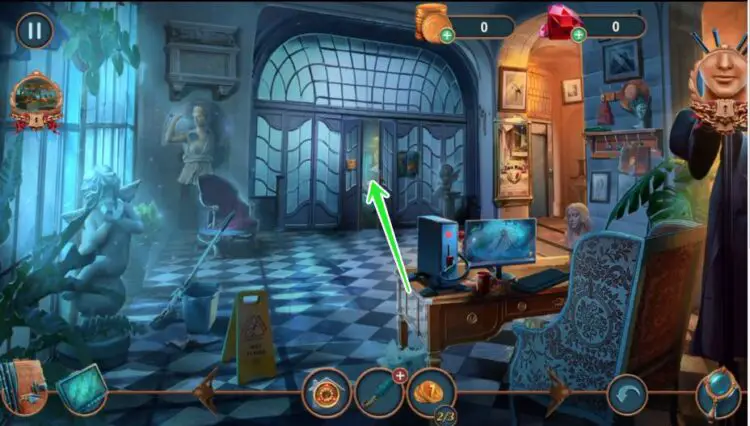
Talk to the detective and go through all dialogue options until you receive the latex gloves. Put them on to complete a puzzle and get the first piece of evidence.
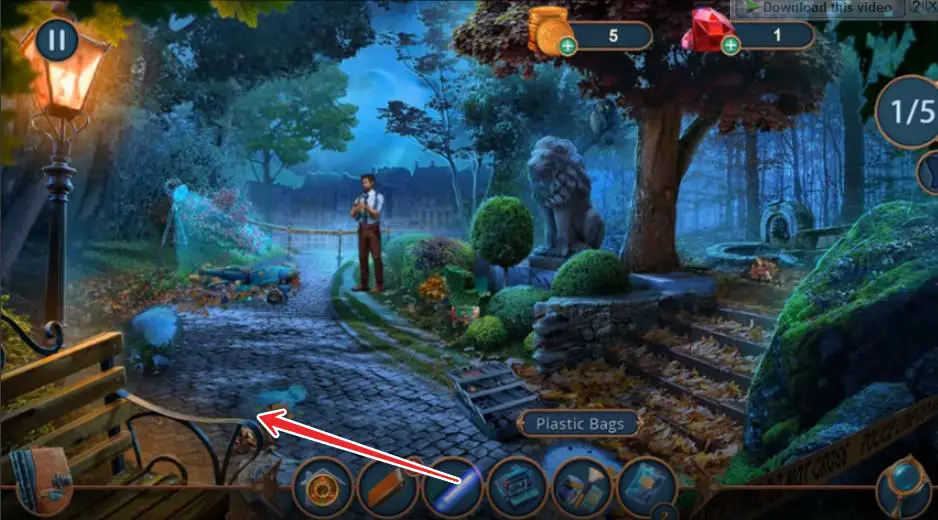
You’ll then receive the detective’s toolkit containing a Polaroid, journal, fingerprinting kit, and plastic bags.

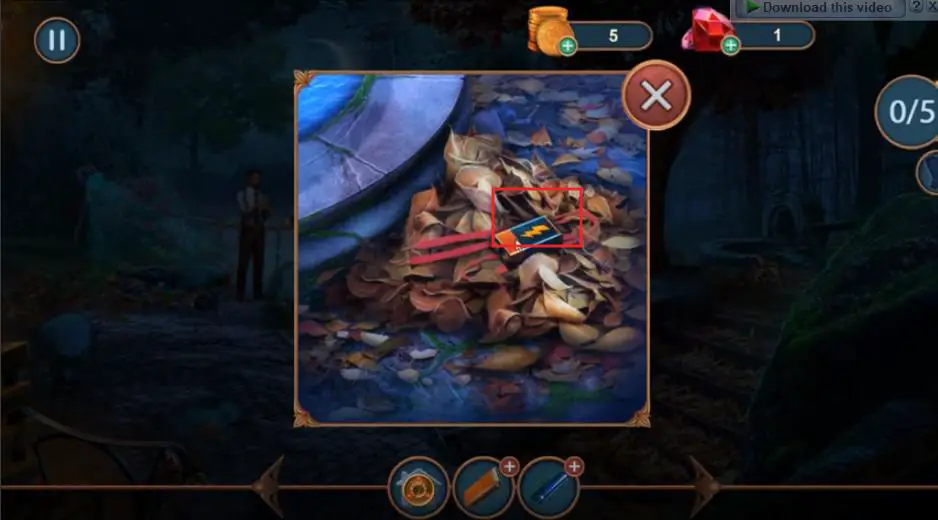
Use the bags to collect the second piece of evidence. Then use the fingerprinting kit to get the third. Pick up the broken UV lamp and the garden rake.

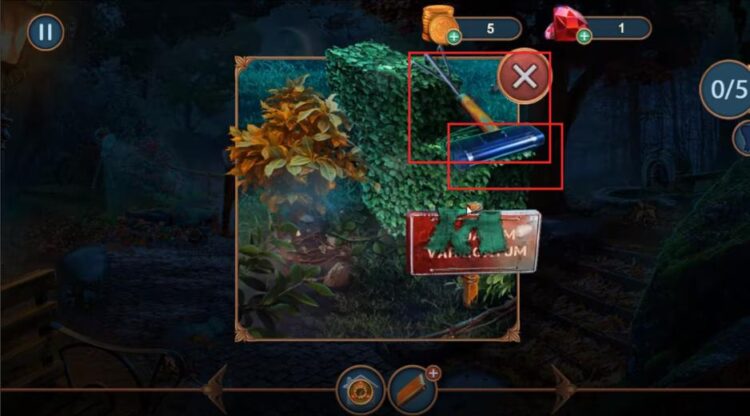
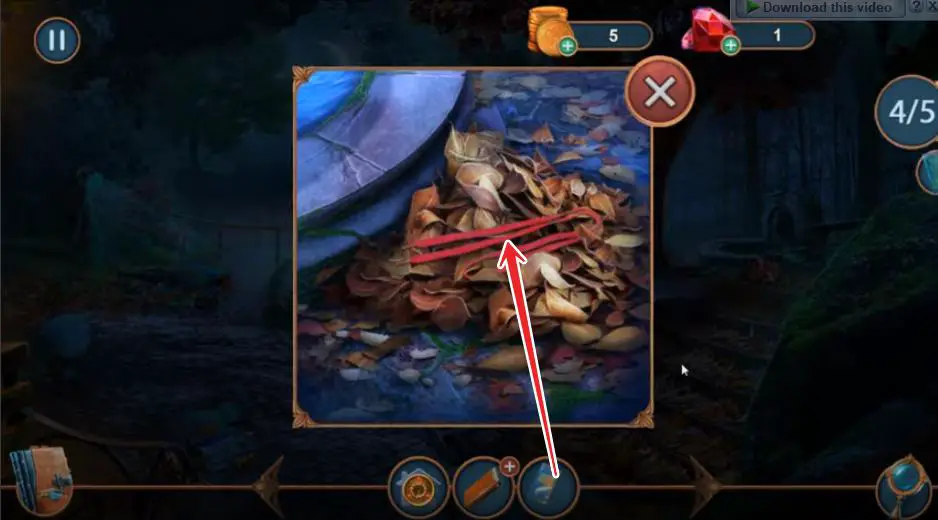
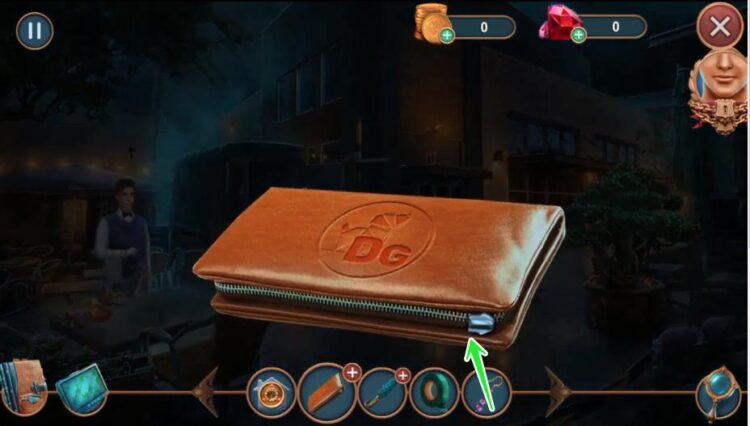
Use the rake to pull out a battery and use the bags again to take the fourth piece of evidence. Combine the battery with the broken UV lamp to repair it, then collect the house-shaped keyring and wallet nearby.

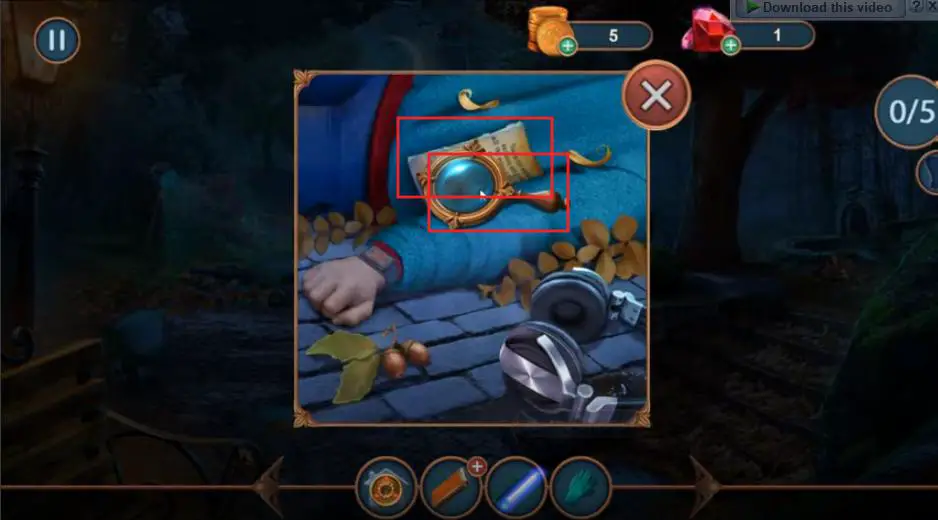
Use the UV lamp to reveal a clue, take a Polaroid of it, and collect the fifth and final piece of evidence.
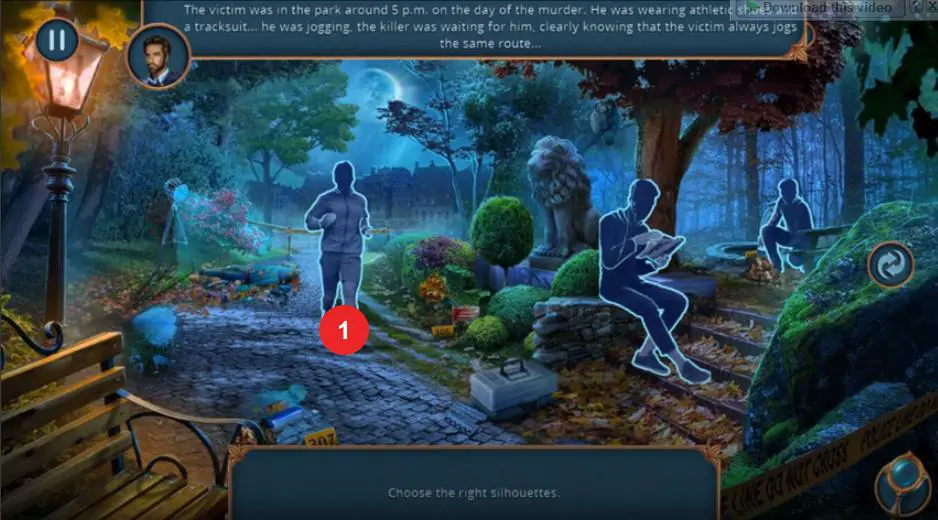
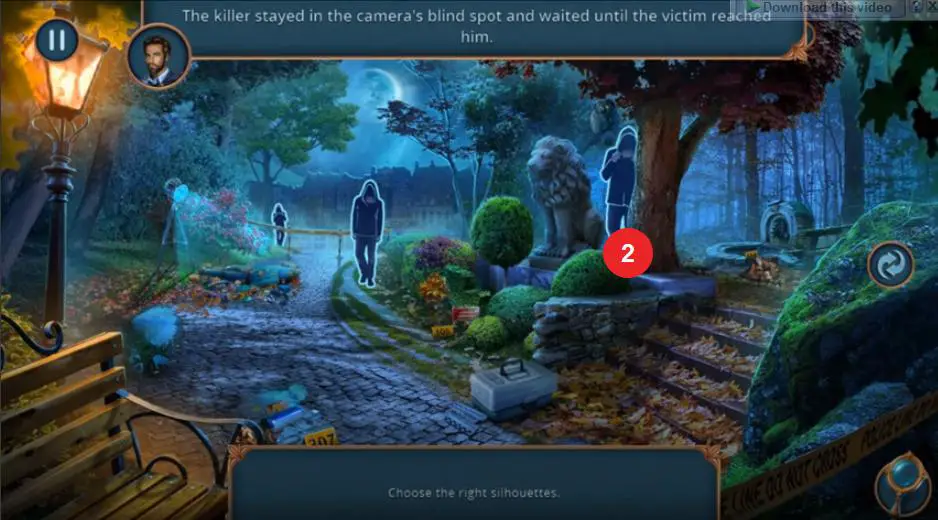
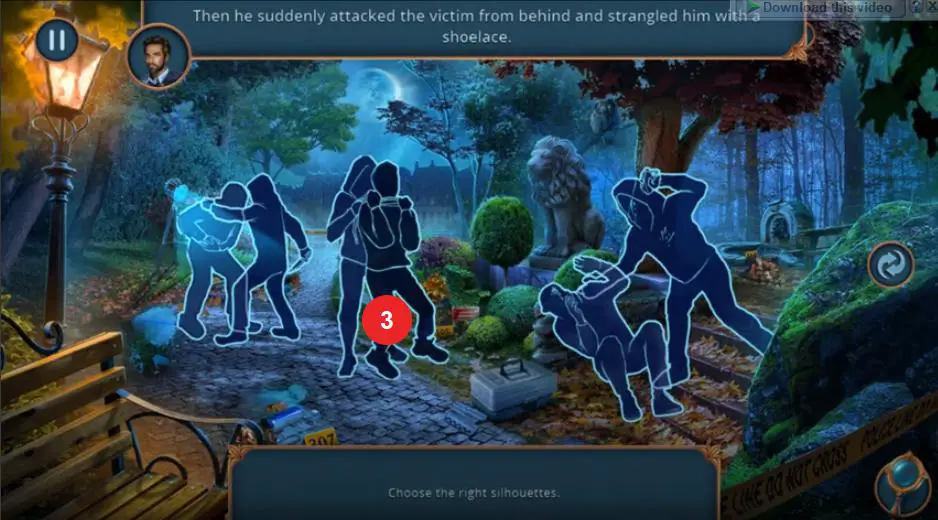
When prompted, choose the correct silhouettes and make the selections in order to continue. This unlocks a short sequence that moves the investigation forward.
You’ll receive a bottle of water. Take the map, duct tape, and sponge from the area, then pick up a foldable umbrella.
Use the sponge with the bottled water to clean a spot and find a hook earring. Attach it to the wallet to get some notes, the first coin, and Otto’s permit. Show Otto’s permit to proceed.
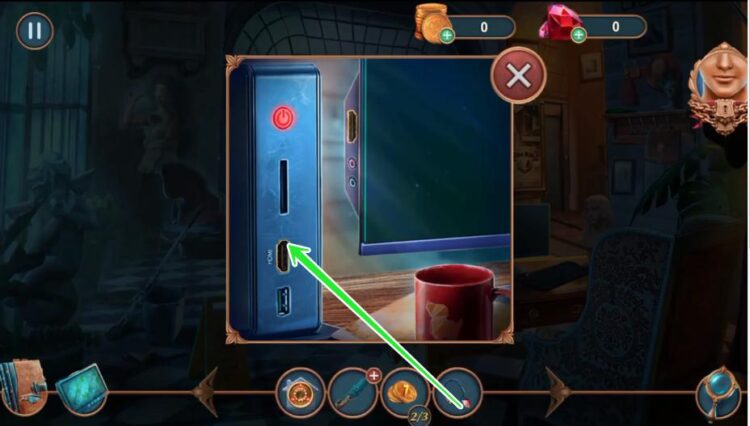
Continue exploring and talk through every dialogue choice. Take the second coin and a cable plug. Combine the cable plug with duct tape to make an HDMI cable.

Connect the HDMI cable to the display. Rearrange the symbols on the screen until they match the clue shown.

Swap tokens as needed until the sequence aligns correctly to activate the monitor and continue to the next part of the case.

Silhouette Puzzle and Otto’s Office
Once the monitor powers on, check the footage and review the clue.
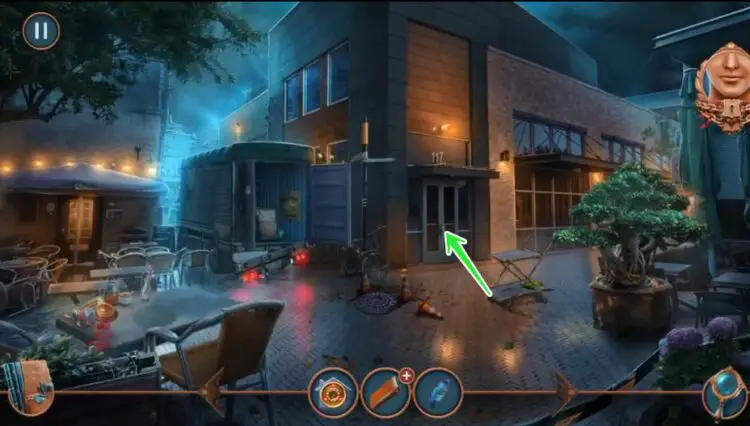
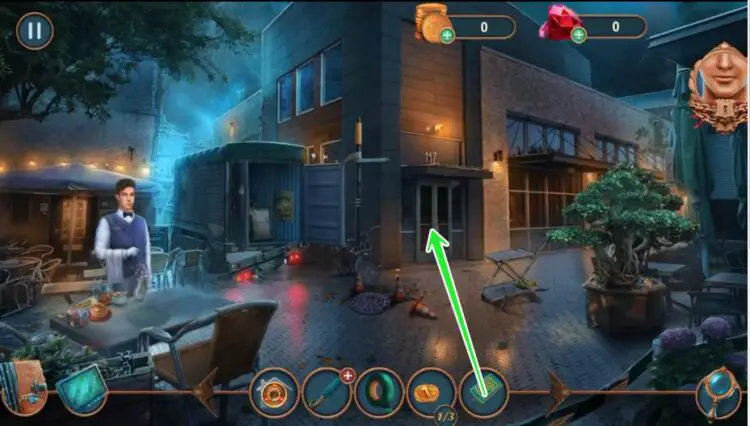
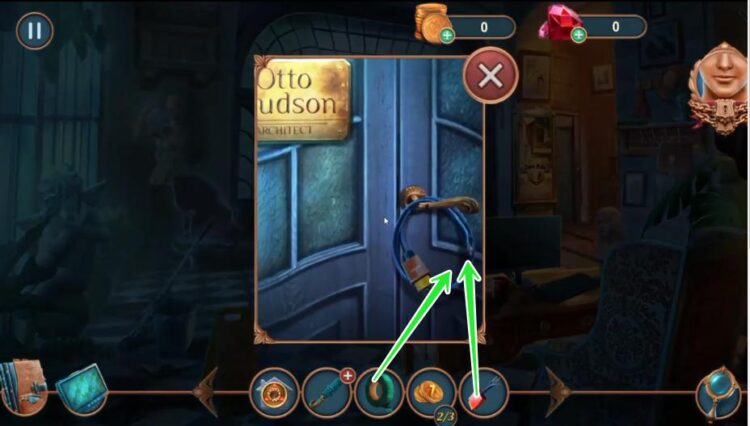
After that, head outside and use the map to reach Otto’s Office. Enter and start searching the room.
Take the keycard and the pair of scissors from the desk. Use the scissors to cut open the sealed envelope and read the document inside.

Pick up the paperclip and use it on the drawer to unlock it. Take the screwdriver and the phone charger.
Plug the charger into the socket and connect it to the phone on the table to turn it on. Go through the messages to unlock a hint about the next lead.
Examine the cabinet near the corner and take the photo. Then look at the bookshelf and remove the folder to find a USB drive hidden inside.

Insert the USB drive into the laptop on the desk and view the files. You’ll get a set of coordinates.
Write them in your journal, then pick up the small key lying beside the laptop.
Use it on the locker to the right. Open it and take the notebook and the second photograph. Combine both photographs to reveal a matching detail, which confirms Otto’s location.
Go back outside and use the map again. Travel to the alleyway marked on the coordinates. Inspect the trash bins and take the crowbar. Use it to open the locked storage door.
Inside, look around and collect the gloves, the crowbar back, and a flashlight. Turn on the flashlight to reveal a stain on the floor. Use the fingerprinting kit on it to collect another piece of evidence.
Check the shelf on the left and take the oil can and a piece of wire. Combine the wire with the screwdriver to make a makeshift hook.
Use it to reach the item behind the pipe and pull out a metallic badge. Examine it in your inventory to reveal initials engraved on it.
Leave the storage and return to Otto’s Office. Use the oil can on the rusty drawer and open it. Take the camera lens and combine it with your Polaroid to repair it.

Use it immediately to take a photo of the crime board and then another of the document on the desk.
Now use the evidence board in your journal to connect the clues: Otto’s permit, the badge, and the phone messages. Once connected correctly, a short sequence will trigger showing the detective piecing things together.
After that, grab the sealed folder from the desk and open it with the paperclip again. Inside you’ll find a note with numbers and a small metallic chip.
Combine the chip with the USB drive and plug it into the laptop again to unlock a hidden file. Read through the new text until you receive the next set of coordinates.
Leave the office and head to the marked location on the map, which leads to the Warehouse Entrance.
Warehouse Entrance through Basement Investigation
Arrive at the warehouse and inspect the locked door. Check the nearby crate to find a broken padlock. Move the tarp beside it to uncover a crowbar.
Use it to remove the wooden planks blocking the side door and go inside. Once you’re in, take the fuse from the shelf and look around the room. Pick up the hammer, the roll of tape, and a short wire.
Use the hammer to break open the small cabinet and find a damaged control panel. Place the fuse inside, then fix the wires using tape to restore power.
This lights up the room and reveals a keypad near the entrance. Look at the wall beside it and you’ll notice faint numbers written in chalk. Enter those numbers on the keypad to unlock the door to the next area.
Go forward and turn on the flashlight. Search the boxes and take a pair of pliers and a metal rod. Use the pliers to remove nails from a wooden crate, and take the crowbar head inside.
Combine it with the metal rod to form a full crowbar again. Use it to open the trapdoor on the floor and go down into the basement.
Once you’re in the basement, turn on the flashlight again and inspect the generator. Open the panel and collect a small gear and a circuit board.
Check the nearby shelf for a wrench and use it to loosen the bolts on the side of the generator. Replace the missing gear and place the circuit board in its slot, then flip the main switch to restore partial power to the area.
When the lights come on, look around and take a closer look at the wall markings. There’s a clue written in red that points to a safe hidden behind a painting.
Move the painting aside and find the safe. Enter the code you found earlier in Otto’s office to open it and take the diary, a photo strip, and a silver key.
Examine the diary to unlock a cutscene that gives new details about Otto’s connection to the case. Once the scene ends, use the silver key on the metal door to the right.
Inside, take the empty canister and place it next to the leaking pipe to collect fuel. Use that fuel on the generator to fully restore power to the warehouse.
Go back upstairs and check the main control terminal. Insert the metallic chip again and start the data transfer.
While it uploads, use the Polaroid to take a picture of the terminal screen to add it to your evidence. When the upload finishes, you’ll receive an alert that points to another address tied to the investigation.
Exit the warehouse through the newly powered door and use the map to travel to the motel marked on your journal.
Motel sequence up to the hidden room discovery
Reach the motel and talk to the clerk at the counter. Go through all dialogue options until you get the room key. Take the newspaper from the table and look at the map printed on the back.
Head upstairs and use the key to open Room 6. Once inside, check the bedside table and collect the lighter, the photo frame, and a piece of paper tucked behind it. Read the note to find a coded message.
Look under the bed and grab the toolbox. Open it using the screwdriver from earlier and take the pliers, a roll of wire, and a broken keycard.
Combine the wire with tape to repair the card’s damaged strip. Use it on the slot next to the wardrobe to open a hidden compartment. Inside, pick up a torn letter and a memory stick.
Insert the memory stick into the laptop on the desk and open the folder named “Surveillance.” Watch the short clip and take a Polaroid of the frame showing Otto.
Collect the folded napkin on the desk and inspect the stains to reveal another clue. Take the pen lying next to it and use it on the coded message from the table to complete the missing numbers.
Next, light the candle on the shelf using the lighter and hold the paper above it to reveal hidden writing. It shows coordinates for an abandoned apartment block. Before leaving, take the key hanging from the back of the door and the second photo lying on the carpet.
Leave the room and go back down to talk to the clerk again. Show him the photo and he’ll give you a small box. Open it in your inventory and take the ring and another note inside.
Combine the ring with the torn letter to reveal Otto’s initials engraved on both. This confirms the motel link to his movements.
Use the map to travel to the apartment block. Once there, push open the half-broken door and enter the hallway.
Take the crowbar again to remove the planks blocking the stairs, then go up to the first floor. Check the left door and use the silver key from the basement to unlock it.
Inside, look around the dusty room. Take the camera battery from the table and the cassette tape from the drawer. Put the battery into your Polaroid to fully restore it.
Use the camera on the writing on the wall to capture the message. Then go to the cassette player on the counter and insert the tape. Listen to the conversation to learn about a “hidden room behind the freezer.”
Go to the kitchen and move the refrigerator forward. Behind it, find a metal hatch locked by two bolts. Use the wrench to remove them and lift the hatch.
Go down into the narrow passage. Pick up the flashlight again and move forward through the corridor until you find a small office area filled with boxes.
Search the boxes to find the sealed envelope and the third photo. Open the envelope and take the keycard labeled “Sublevel.” Use it on the nearby elevator panel to unlock access to the hidden basement. Press the button and descend.
The elevator doors open to a dark corridor. Turn on the flashlight and move ahead until you reach a door with a keypad. Enter the same code from the motel message and step into the hidden room.
Inside, examine the evidence board covered with photos, notes, and strings connecting them. Take the notebook on the table and read the final entry, which ties every location together. Then take the sealed case file from the shelf and add it to your inventory.
Use the Polaroid one last time to photograph the board. Once the picture develops, the final cutscene triggers, showing the detective’s conclusion about Otto’s involvement and the completion of the case.
After the sequence ends, the screen fades to the summary screen showing all evidence collected and your investigation score.
Post-case Sequence
After the summary screen, the detective returns to the office for the final report. Watch the short cutscene where he pins the last photo on the evidence board.
Once control returns, inspect the board and zoom in on the center photo. Select each clue one by one to review the case details. When all five are examined, a message appears prompting you to file the report.
Go to the desk and open the file drawer. Place the sealed case file inside, then close the drawer to complete the paperwork.
Take the recorder from the table and play the last audio entry to hear the detective’s final thoughts. When the message ends, open the window blinds to trigger the next dialogue sequence.
A call comes in on the office phone. Answer it and listen to the chief’s briefing about a new lead. Once the call ends, take the new folder that appears on the desk and flip it open.
Inside you’ll see the first teaser photo for the next investigation. Collect it, then pick up your car keys and the badge.
Before leaving, use the Polaroid to take one last photo of the finished board. The detective pauses briefly to look at the results.
When you exit the office, a cutscene plays showing him driving through the city at night. The voiceover explains how the case ties into a larger network of crimes, leaving the final clue unresolved.
When the scene fades, the credits roll with soft background music. After the credits, you return to the main menu where “Unsolved Case 1: Fatal Clue – Completed” now appears beside a new locked case marked “Coming Soon.”
You can replay the case to find missed evidence or start a new profile for a different ending. Once the menu resets, the notebook automatically updates with a short note hinting that Otto’s trail continues. The Polaroid sits on the desk as a reminder of the case closed but not forgotten.


