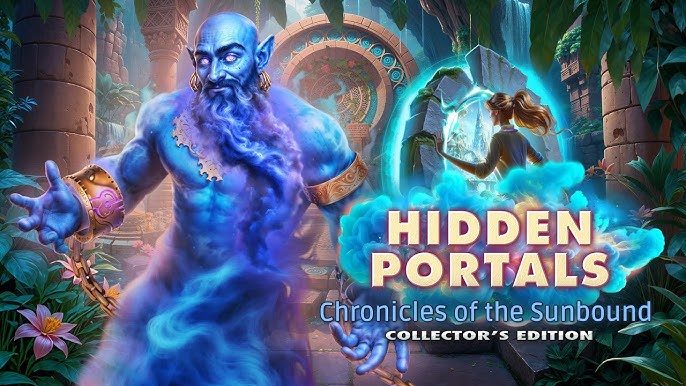
This chapter opens up a new section of the map and drives the main story further as the effects of the Guardians’ past entwine with the present. After the tall tower collapses, it becomes clear that danger is imminent. You escape, but no one knows Rahid’s fate. There is reason to believe he is alive and hiding for reasons unknown.
Despite the worries that accompany the journey to the Oasis, it is nothing short of a miracle. This place offers the answers needed to maintain the balance of life, but the journey to it is a long one. Oasis used to be a place of refuge for those avoiding the mayhem of the city. That is, until a colossal snake, a creature of the unknown, came to disrupt the peace.
Explore the surroundings, swim to the bottom of the lake to retrieve the map, and figure out a plan to deal with the dragon. You’re in luck, as you stumbled upon the chronicle of a former Oasis inhabitant, where she recounts the attempts to make a potion that would tame the serpent and the blank book that contains illustrations of the snake and other mystical creatures.
As you continue your quest, you uncover the mysteries of the guardians hidden observatory! Watchers of the moons and recorders of the important celestial events, this place is a true marvel of the desert. With no traps to worry about, you must quickly study the records before the desert sands claim the observatory and its secrets. What does the future hold for the Oasis?
Your final challenge is to find the Heart of the Oasis, hidden among the treacherous dry lands and mirages. Many travelers have succumbed to the illusions. The journey can only be done with the special amulets used by the guardians. As you explore the ruins, you will hopefully find these artifacts, which will let you remove the illusions and get closer to the final truth.
Bonus Chapter Walkthrough – Hidden Portals 2: Chronicles of the Sunbound
First off, read the book and take one of the three crystals, along with the broken fan. Use the trident on the algae and play the puzzle to earn the crocodile jaw.
Set the Crocodile Jaw and Use the Pickaxe
Use the crocodile jaw on the rope, read the note, and take the magic powder. Use the magic powder and solve the symbol puzzle by clicking the symbols in order, then go forward.
Take the torn cloth and the crystals, two of three. Read the note, attach the wooden handle to the pickaxe head, and take the pickaxe.
Use the pickaxe on the crystals and solve the random puzzle. Collect the crystals three of three and use all the crystals on the gate, then go forward.
Collect the Well Handle
Read the book and take the well handle and lasso. Use the lasso and solve the path puzzle to earn the dragon scale and large fish bone. Use the dragon scale and take the hair clip, then select the dialogue option.
Use the hair clip and big feather on the broken fan to repair it, then use the fan. Play the puzzle to earn the portal map and use it.
Take the little flat plate and ring, then use the well handle to take the blunted harpoon and fish oil. Use the fish oil and solve the random puzzle to bring the threads.
Visit the Observatory
Go to the observatory and take the dividers and moons, one of two. Use the dividers to take the brush and frame fragment. Use the frame fragment to take the brass needle, then return to the oasis camp.
Use the ring, threads, and large fish bone on the torn cloth to restore it. Use the restored cloth and take the empty bolas, liana, and bestiary. Use the bestiary on the beast and solve the drawing puzzle to earn the drawing with an anomaly.
Make use of Drawing
- Use the drawing with the anomaly on the potions and take the potion for the serpent. Use the potion on the beast and take the snake skin. Play the puzzle to earn the fossilized starfish.
- Use the fossilized starfish on the blunted harpoon to make a harpoon. Use the harpoon on the chest in the water and read the note. Select the dialogue option to receive the knife, then go forward.
- Use the small flat plate and the knife on the strange plant to collect sticky fruit juice. Use the juice to take one of two painted tiles, dry clay, and pliers, then go to the City of Zarab.
- Use the brass needle on the closed chest and take the paints and telescope handle. Return to the observatory and use the telescope handle to take an image of the moons. Use the image and paints to take Moon’s two of two.
Utilize Moons
Use both moons on the stands and take the star-shaped amulet, then return to the city. Use the pliers on the boarded palanquin and solve the chip puzzle. Read the note, then take the tray, the broken amulet, and the stone.
Use the stone and liana on the broken amulet to make bolas, then use the bolas. Play the puzzle to earn wine and select the dialogue option. Use the wine, dry clay, and snake skin on the pottery wheel.
Solve the figure assembly puzzle and take the clay figurine, then go back. Use the star-shaped amulet on the wall slot to take coal powder. Use the clay figurine and take the painted tiles two of two, then return to the observatory.
Make use of Coal Power
Use the coal powder and the brush to solve the chip arrangement puzzle. Read the note and go back to the oasis camp. Use both painted tiles on the tiles and take gems one of two.
Go to the City of Zarab and play the puzzle to earn dandelion leaves. Go to the crystal fissure and use the leaves to take paddles, one of two, and the chain. Use the chain on the fissure and solve the sphere puzzle.
Take the silver cup and use it on the scorpion to get scorpion venom. Return to the city and use the venom on the chains. Read the note and take the cane and gems two of two, then go back.
Play the puzzle to earn the medallion and select the dialogue option to receive the flask of magical liquid. Use the flask and both gems on the broken amulet to create the amulet of insight. Use it on the portal and solve the timer puzzle.
Take one small hourglass, one of two, and the pendant. Use the tray on the waterfall to draw the correct order. Use the cane, pendant, chain, and drawing, then solve the random puzzle.
Discover the Ice Sphere
Take the ice sphere and ladder-shaped amulet. Use the amulet on the floor slot and go forward. Take the small mirror and phoenix feather, then use the feather on the statue.
Play the puzzle to earn beads. Use the beads, read the tablet, and take the cloth and paddles two of two. Use both paddles on the boat and guide it using the arrows, then select the dialogue option.
Take the spirit, hammer, and small hourglasses, two of two. Use the hourglasses on the stand and solve the arrow puzzle. Take the mosaic fragment and use it to take the bracelet, then go back.
Use the Bracelet
Use the bracelet on the statue’s hand to get portal runes, one of three. Play the puzzle to earn the golden scarab, then use it to take the phoenix. Go back and use the phoenix to regain the fire sphere.
Go to the oasis altar and use the fire sphere with the ice sphere to take the crystal bell. Use the bell and solve the bell arrangement puzzle. Take the bag, open it, read the note, and take the chisel.
Go to the ascent to the oasis and use the chisel and hammer. Solve the tile-rotation puzzle and take the box with the small mirror. Use the box and mirror on the rock, then use the spirit and cloth on the box to take the hairpin. Use the hairpin and solve the lock puzzle.
Take portal runes, two of three, and the stone plate, then go forward. Use the stone plate on the floor mosaic to take portal runes three of three and a gear. Use the gear to remove the wax, then use the wax.
Solve the chip puzzle and take the mug, then go forward. Use the mug to earn Oasis water and use the water with all portal runes. Solve the final random puzzle.
Congratulations. You have completed Hidden Portals 2: Chronicles of the Sunbound – Bonus Chapter.


