Haiku Games is back with another adventure which is about Kate Gray. It is the fourth sub-installment of the Trapmaker series and the major release under Adventure Escape Mysteries. The story is about Kate who set up herself on an epic journey from Europe to Asia with objective of stopping her arch-enemy trapmaker.
Furthermore, Trapmaker Returns is a continuation of the a few month back released Rendezvous. If you would really love to experience what’s going on back, then we recommend you to play the said game first. This walkthrough guide is to help you in case if you stuck anywhere with no clue of how to solve puzzles in Trapmaker Returns. Use comment section to ask if you need some extra help in regards to mini-games and puzzles.
Chapter 1 – Trapmaker Returns Walkhrough
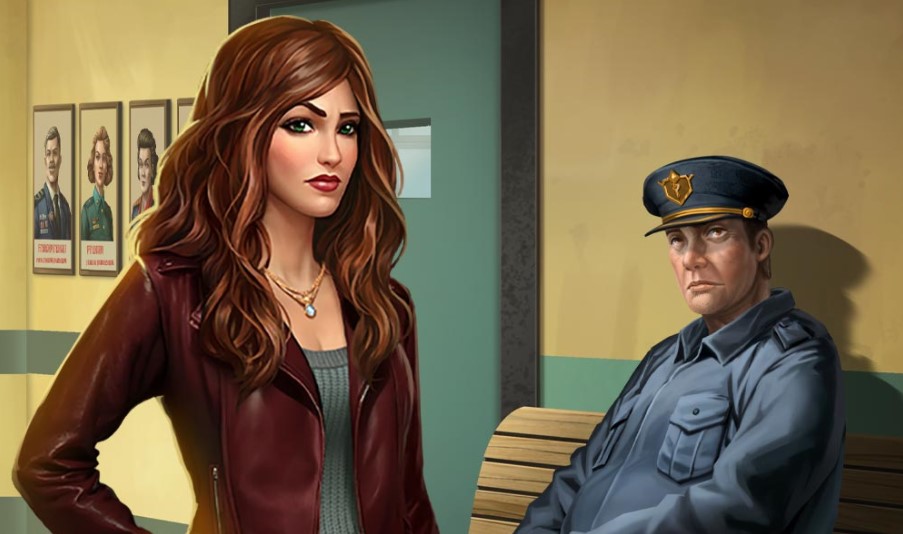
First off, play as Detective Kate Gray and learn that Trapmaker escaped with Allie from the engagement party at the château in France.
Talk to Murphy and choose the option to find everything you can on Trapmaker’s new identity. Call Allie next and choose any dialogue option, then let her hang up on you.

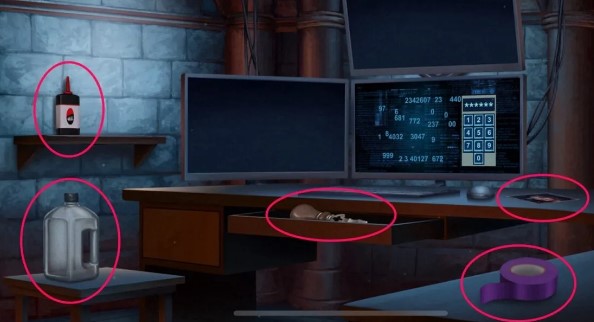
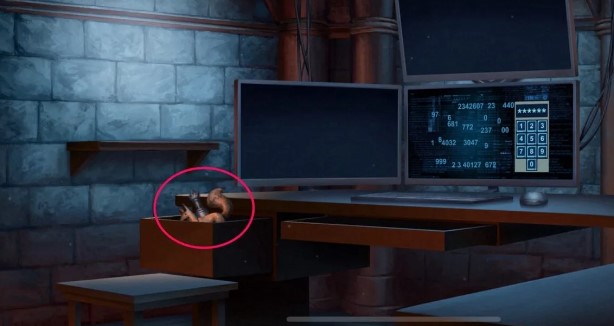
Next, move the chair away from the desk and collect the duct tape, empty bottle, oil bottle, photo, and antique screwdriver from the room. Pour the oil on the stuck drawer and open it, then take the fox sculpture from inside.
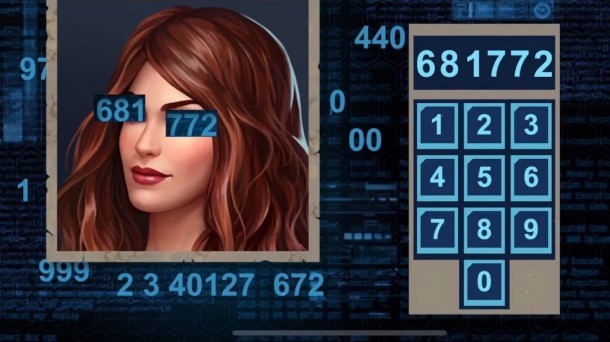
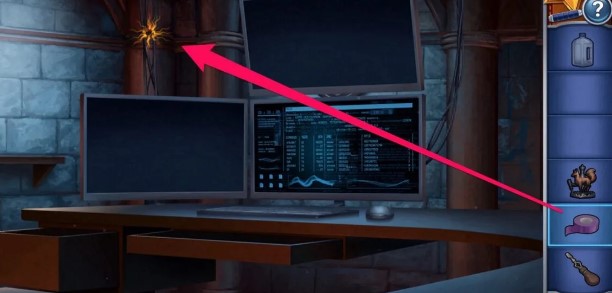
Then tap the computer screen and see that it needs a passcode. Place the photo over the screen and slide it around until three numbers appear in the eye cutouts. Read the full code as 681772 and enter it to unlock the computer.
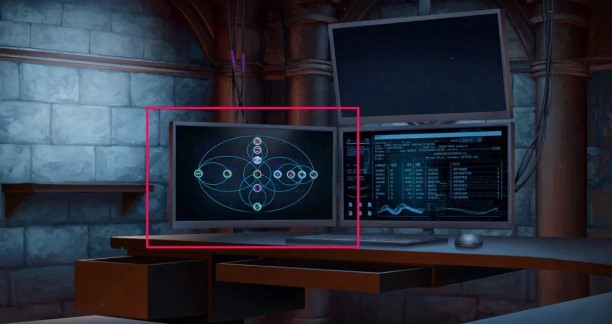
After that, notice one of the wires is short-circuiting and wrap it with duct tape to repair it. Look at the screen when it turns on and start the satellite puzzle.
Rearrange the satellites until the inner satellite matches the outer ring, swapping two satellites on the same orbit whenever needed.
Next, tap the top computer screen and start a call with the Interpol agent. Choose the option about urgent news on an international fugitive, and let the power cut off before finishing the call.

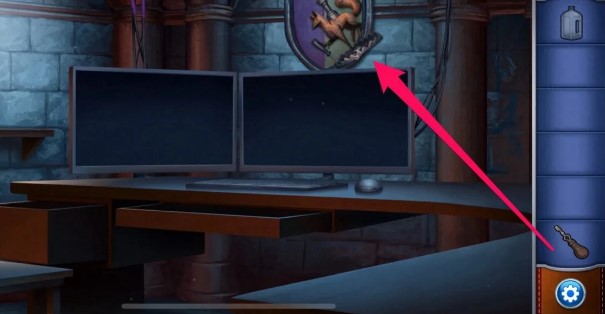
Then place the fox sculpture onto the emblem on the wall and tighten it with the antique screwdriver. Open the secret door and go through into the next area.
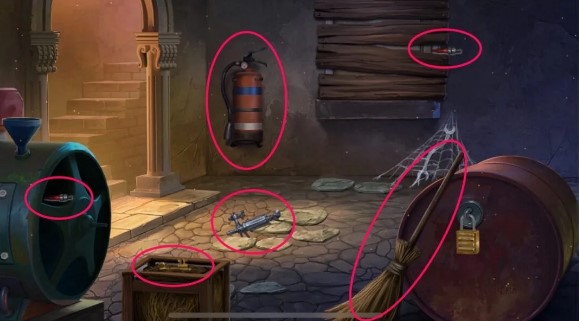
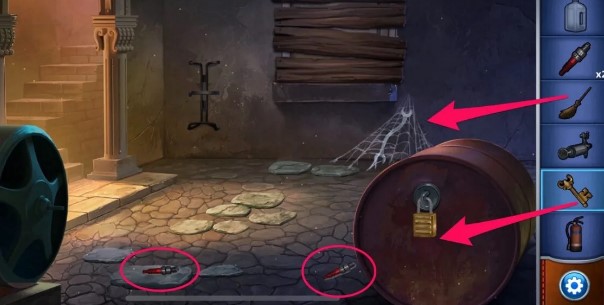
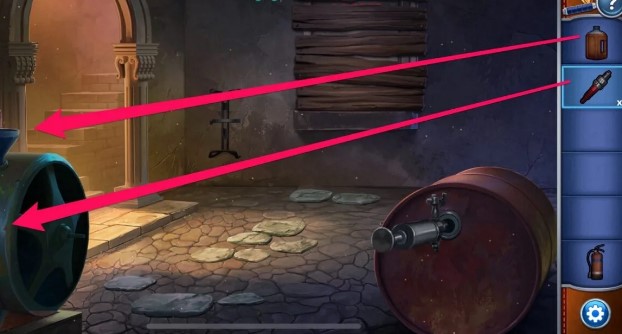
After that, pick up the broom, fire extinguisher, spark plug, another spark plug, the gold key, and the bar tap from the room. Collect two more spark plugs nearby so you have a total of four.
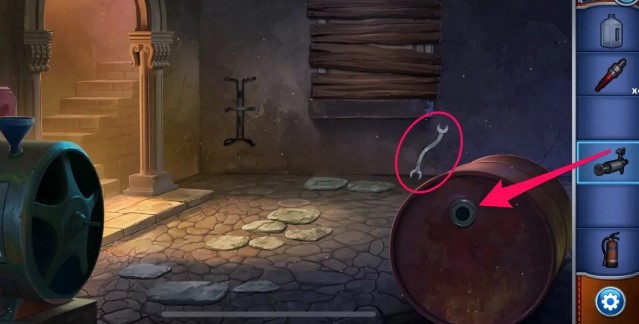
Next, unlock the locked area with the gold key and sweep away the cobwebs with the broom. Take the wrench from behind the cobwebs and attach the bar tap to the oil drum.
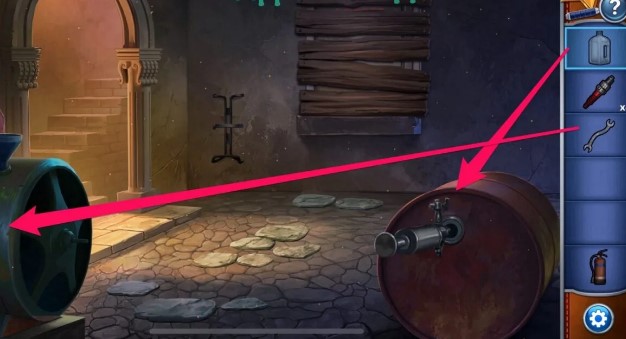
Then fill the empty bottle with oil from the drum. Open the generator panel with the wrench, remove the old spark plugs, insert the four new spark plugs, and pour the oil into the funnel to restore power. Return upstairs after the power comes back on.
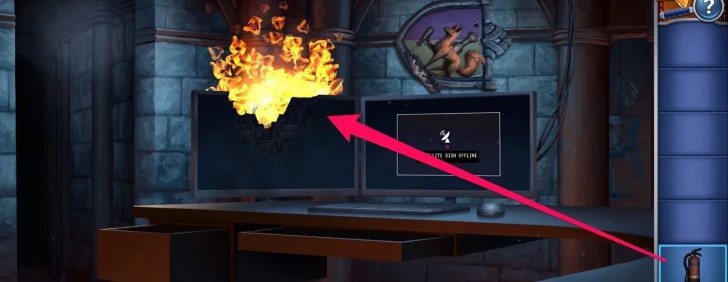
After that, put out the fire with the fire extinguisher and take the bent metal from the burned area. Go back downstairs and pry off the wooden bars with the bent metal to clear the path forward.
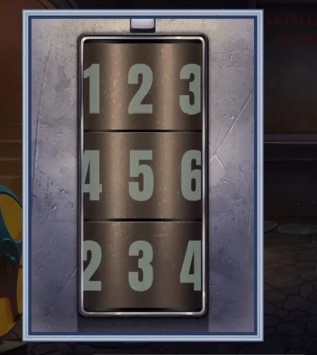
Next, inspect the stones on the floor and count the groups as two, five, and three. Enter the code 253 into the lock and take the climbing gear.
Then start the climbing puzzle and move Kate and Melissa toward the ladders at the top of the wall. Select handholds next to each character and avoid selecting handholds of the same color at the same time until both reach the top.
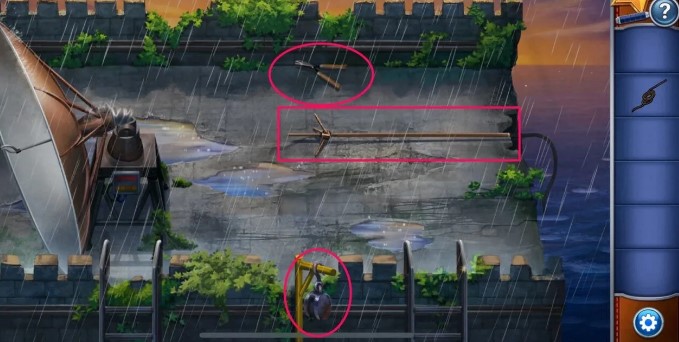
After that, collect the hedge clippers and the pulley from the area and pull the pole upward to prepare it.
Cut both hedges with the hedge clippers, place the pulley onto the pole, attach the rope, and pull the satellite dish up into position.
Next, count the raised brick groups at the top and bottom of the structure and read the two codes as 6116 and 4322.
Finally, talk to Interpol again, choose any dialogue option about the coordinates, and watch them blow up the boat to finish the sequence.


