

Escape from the Shadows shares similar gameplay mechanics with other titles from the same series, requiring you to explore rooms, interact with objects to uncover hidden items, and solve mini-games to collect clues and progress through the mystery. The house comprises multiple decorated rooms, each packed with clues and interactive elements that help you unlock new areas as the story unfolds.
Start by exploring every room carefully, tapping on objects to zoom in and inspect for any interactive parts. Each discovered item goes into your inventory, where you can examine, combine, or dismantle them for use later. Use the side arrows to move between rooms, as each space presents its own puzzles. Although there’s no interaction with NPCs for clues, a hint system is available if you get stuck, but it costs in-game currency. Danger lurks in the shadows, so remain alert as you explore each corner of the house.
Escape from the Shadows Walkthrough
Walkthrough Begins – First Set of Rooms
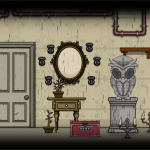
Begin the game by heading near the staircase and tapping the table to inspect every photo frame. Flip the frames to reveal a key, then go upstairs and select the key from your inventory to unlock the bowl on the table, placing the key inside to trigger the next part.
Move to the right-side room, collect the Duct Tape from the shelf near the plant, and open the box on the third rack to obtain a Charger. Head over to the table, open the file, and collect the paper inside, which contains important patterns for later use. Once done, return downstairs.
Power Up the Tablet and Solve First Mini-Game
Enter the inner room, plug the Tablet into the Charger, and start the mini-game by following the pattern drawn on the paper you just found. After completing the game, take note of the four shapes displayed on the tablet. Leave the room and approach the pink box near the exit door. Use the same shapes to unlock it and collect a pair of Gloves and another Key.
Access New Room and Gather Key Items
Head back upstairs, enter the computer room, and attempt to check the computer for data. It shows nothing at first, so investigate the box on the shelf and set the correct dots as follows:
- Green: 4 dots
- Pink: 5 dots
- Blue: 3 dots
- Red: 1 dot
This opens the box to reveal an External Hard Drive, which you must plug into the Computer to access hidden data, including four photographs that help solve a puzzle outside the room.
Return to the previous area and tap the box on the left side of the hallway. Set the shapes based on the photographs to open it and collect a Key. Use this key to unlock the door on the right side and enter a new room.
Explore the Next Room and Solve Symbol Puzzle
In this room, open the bottom drawer to collect a photograph, then read through a book titled “Witches” to gain more context. Proceed through the next door to discover another room, and search the cabinet storage to find a book. Open the book to see the numbers 10, 4, and 23—these are dates needed to solve the next puzzle.
Take a few steps back and examine the calendar near the stairs to determine which symbols correspond with these numbers. Use that information and return to the storage cabinet in the inner room, then set the same symbols to open it and collect a Chess Piece and a Wrench.
Before leaving, inspect the images on the board and flip them to learn the exact placement of the chess pieces.
Chess Puzzle and Battery Installation
Go back to the chess board on the table, place the piece, and align it based on the image positions seen earlier. Completing this puzzle opens a drawer containing a Large Battery, which you must collect.
Go upstairs, head through the right door, and continue right to find a TV. Use the wrench to unscrew the panel, insert the Battery, and power it on. Refer to a card in your inventory showing certain items and scan the following objects using the treadmill:
- Duck
- Flask
- Clock
- Rocket
These scans provide clues that help unlock the nearby cabinet. Once open, collect the Sugar and a Sheet from inside.
Uncovering the Hidden Room
Return downstairs and go to the inner room, where you must place the bag of sugar on the floor. Wait until footprints appear, leading you toward a bookcase, which the detective then moves, revealing a hidden passageway.
Inside this secret room, grab the Sandpaper and rub it on the front wall to uncover a series of symbols. Go to the storage cabinet on the left, replicate the symbols, and open it to collect a Cutter and a Brush.
Move to the table on the right, use the brush to lift a fingerprint from a glass, and apply Scotch Tape to capture it.
Use Fingerprint to Unlock Drawer and Vacuum Puzzle
Exit the hidden room, go upstairs, and head right again until you find a table near a locked drawer. Place the Scotch Tape with the fingerprint onto the scanner to open the drawer and get a Vacuum Hose.
Return to the hidden room, tap on the Vacuum Cleaner, and attach the Hose. Turn it on to suck up objects from the rat hole, then use the Cutter to open the vacuum bag and retrieve a Magnetic Card.
Take the card upstairs, move right, and approach the box above the table. Use the Magnetic Card to unlock it and find a book with “Penumbra” written three times inside.
Final Confrontation with Laia and the Puzzle
Visit Laia, who reacts fearfully upon noticing the open scissors in the detective’s hand. A sense of darkness now surrounds the protagonist, prompting a journey into another puzzle.
Start the jigsaw puzzle and complete it to unlock a vision that may help in bringing Bastian back. Solving this part marks a turning point in the mystery, setting the stage for the final chapter in this shadowy investigation.


