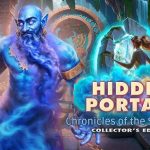
As you venture into the depths of a scorching hot desert, you are determined to find out the mysteries behind the ancient Gate. Strange energy is emanating from the Al-Khazneh temple in Petra, which has drawn Alice and Caleb to Jordan. The trip seems uneventful until Alice discovers a picture of a wall that appears to be glowing.
All of a sudden, Caleb disappears and a blinding sandstorm engulfs Alice. The stone that has now come to life has inscribed glowing symbols all over Alice’s skin. Blazing sun. Ancient prophecies. Burning desert. Alice is all on her own, and has to figure out what happened to Caleb.
As you traverse the ruins, Alice discovers that they shift and change. Alice discovers the Gate’s strange powers may be the only thing that will save Caleb. Along her journey, Alice encounters a desert guide, Rahid, and others who aid her. However, she is not the only one who is being pursued, and no one seems to understand why.
This story occurs in real locations within Jordan. Adventures include the petal pink Al-Khazneh temple and the ancient Nabataean peoples, the tough desert life and henna designs. During the day the sand burns, and in the late night the cold is crisp.
Strong choices are often needed to survive. One must stay in the shade, and be cautious, as some oases are not safe. If you find yourself having trouble with a puzzle and cannot find an item, you may view the walkthrough for Hidden Portals 2; Chronicles of the Sunbound on our website to learn how to unlock the secret of the gates.
Hidden Portals 2 Walkthrough – Here’s how to solve puzzle
First off, take the turtle shell and forceps, then collect the oil and wet wipes. Use the wet wipes on the backpack, read the note, and take the lighter and dagger.
Puzzle and Item Collection
Cut the rope with the dagger and solve the puzzle to earn henna dye. Use the oil and henna dye on the columns, then take the dragon opener.
Sand Paints and Fresco Puzzle
Solve the next puzzle to get sand paints, apply them to the fire bowl, and use the forceps to collect the fresco part. Place the fresco part on the fresco.
Tent Poles and Sling
Read the note, take the tent poles one of two and the Petra globe, then take the feather. Use the turtle shell on the dirt pile to take the sling.
Sling and Branches
Combine the sling with the Petra globe, use it on the branch, and collect the branches. Use the branches with oil and the lighter. Solve the sequence puzzle, move forward, and select the required dialogue option.
Sticky Papaya and Pillow
Read the note, take the sticky papaya with the needle and golden thread, then take the fang. Use the needle and thread on the pillow, take the pillow, and give it to the fox to receive palm leaves and the jewelry box.
Jewelry Box and Animal Picture
Use the feather on the jewelry box and take the animal picture, glass jar, and scorpion figurine, one of two. Go back and use the animal picture to press the animal symbols in the correct order.
Spear, Kite, and Lightning
Solve the puzzle to earn a spear with a rope, use it on the barrel, and take the map and necklace with runes. Use the dragon opener on the nails to take the kite, then combine palm leaves and sticky papaya with it.
Kite and Tornado
Move forward and use the kite on the tornado. Trap the lightning in the glass jar and go back. Use the trapped lightning on the scales, take the scorpion figurine, two of two, and place both figurines on the box to take the harness.
- Solve the puzzle to get the hefty book, move forward, and use the fang and hefty book on the chest. Take coconut milk, the screw, and the tent poles two of two.
- Assemble the tent with both poles and solve the rotation puzzle. Take the bags of cargo, attach the harness and cargo to the camel, and select all dialogue options.
- Continue forward, take the short sword, collect tassels one of three and the newspaper, read the note, and cut the rope. Solve the puzzle to get the hairpin, open the lock, read the note, and take the toucan. Use the toucan to get an empty barrel, fill it with water, and extinguish the fire. Move forward and select the correct option.
- Take the jar and use the necklace with runes. Complete the random puzzle, then take the septum ring. Use it on the lid, use the jar on the fish, and collect the glowing fish.
- Move forward, take the chessboard, and use the glowing fish in the tank. Solve the board puzzle and take the rupee, then exchange it for a tarot card. Give the tarot card to the fortune teller.
Spear, Kite, and Lightning
Solve the puzzle to earn the sitar, use it on the statue, and take the camel figurine, one of two, and the sandbag. Go to the city gates, use the sandbag, solve the number link puzzle, and take the clippers.
Kite and Tornado
Cut the wire, install the valve and screw, and take the camel figurine two of two. Place both figurines on the chessboard, then solve the sequence puzzle to obtain charcoal and a spring.
Hefty Book and Tent Poles
Go back, solve the puzzle to earn scissors, cut the newspaper, and take the lottery ticket. Use it on the machine, complete the sequence, and take the museum ticket.
Assemble Tent and Cargo
Enter the city museum, select the dialogue option, and proceed. Take the clock hand and books one of three. Fix the clock, take the leather glove, use it to collect the brush, and go back.
Short Sword and Newspaper
Use the spring on the small door to take two of the three incense sticks and tassels. Use the brush to collect the suction cup ring. Move forward, use it on the lid, and take the feather bookmark.
- Use the bookmark on the drawer, take books two of three and the knife, then go back. Follow the symbol sequence on the skull puzzle and take the tassels three of three.
- Use all tassels on the rug to get marimba parts, one of two, and bamboo tubes. Cut the bag to take the owl figurine. Move forward, use the owl figurine on the sofa, and take books three of three. Place all books on the shelf, solve the linking puzzle, read the book, and go to Hijar Streets.
- Use the bamboo tubes on the fountain, solve the button puzzle, and take the two-pronged fork. Return to the museum, open the lock with the fork, read the note, and take the developing pigment.
- Apply it to the stand, solve the puzzle, and take the magic lines map. Go to the market, show the map to Rahid, select the dialogue option, and receive the camel lighter.
- Use the incense sticks and camel lighter on the bowl to take the golden stag beetle. Use it on the grid to get the empty jingle bell and marimba parts, two of two. Return to the city gates, place the marimba parts and charcoal, and solve the melody puzzle. Take the frame part and go back to the museum.
- Place the frame part on the painting to take the dagger and mirror. Use the mirror on the stand to collect the earring, pendant with a stone, and spoke.
- Go to the market, solve the puzzle to earn rupees, trade them for the bronze vase, fill it with water, and take twine. Combine twine with the spoke to make a net, then use it on the scout.
- Solve the rope puzzle, use the pendant with the stone on the wax to get the peacock token, and use it on the chest lid. Take the tent part and date, then use the orange on the hot stone and cut it with the dagger. Solve the chip placement puzzle and take the trident.
- Use the trident on the camel’s food, take the brush, open the lock with the earring, and take the ring. Use the ring on the book, interact with the camel and gate, and take the hoof drawing.
- Use it on the sand prints and solve the circle puzzle. Select the dialogue option and take the hookah bowl and nut.
- Combine the date and nut with the jingle bell to make a loud bell, use it on the hook, and solve the puzzle to earn the clock. Place the clock on the scales and read the note.
Rope, Rupees, and Liquid Fire
Read the newspaper, take rupees one of three and a piece of cloth, cut it to get rope, and combine it with the tent part to make a handmade rope. Use it, complete the random puzzle, and select the dialogue option to receive a book.
Flask and Little Palms
Move forward, take the sandstorm in a flask, and little palms one of three. Use the flask, take the two or three little palms and the key, unlock the container, and take the ancient jug.
Backtracking and Fragment Collection
Go back, follow the visual clue puzzle, then take rupees two of three. Collect long coffee spoons, one or two, use the hookah bowl, and take the colorless fragment.
Paint the Mosaic and Ruby
Use the fragment and brush, paint the mosaic, and take the colored fragment. Use it to get the big spring, fill the jug with fountain water, and move to the Streets of Al’Bahir.
Spring, Glove, and Chain
Use the big spring to take the glove and bronze ring, then take the chain. Solve the puzzle to earn the smoke pipe, use it on the barrel, and collect one of two runes and the second coffee spoon.
Rupees and Taming Glove
Use both spoons to get rupees three of three, spend them, complete the random puzzle, and take the scheme and runes two of two.
Hamster, Chain, and Key Fragments
Combine the glove and runes to create the taming glove. Move forward, use it to get the hamster, then use the hamster and the chain to take the lock picks, one of two, and the scraper.
Scrape Moss and Staff
Scrape the moss, solve the switch puzzle, and take the staff. Move forward, pour fountain water on the globe, take three of the little palms, and place them on the model to get the guard figurine.
- Return to the streets, use the staff on the lemon tree to get a lemon, use the figurine, and take the silk shawl. Use the lemon to open the rusted door and collect the brush, sledgehammer, and chisel.
- Go to the palace library, use the shawl to get the flying sphere, then the hourglass amulet. Use the amulet with the book, solve the button puzzle, and go to the rooftop.
- Open the lid with the scheme and chisel, solve the assembly puzzle, and take the steering wheel and cork. Use the cork to get the flute and cezve.
- Use the cezve on the pot, solve the chip puzzle, and take the dirty medal. Clean it, use the steering wheel and medal, then solve the cloud puzzle.
- Select the dialogue option, take the curved tip and sandpaper, brush the shards, and take the lock picks two of two. Open the lock, solve the puzzle, and earn the pulley.
- Use the pulley and flute on the ropes, move forward, and select the option. Take the leather belt, weights one of two, and the weight scheme.
- Take the bow, use the scheme and sledgehammer to get weights two of two, and place them on the drawbridge. Arrange them correctly and move forward.
- Take the target amulet, pot, magical powder, and note. Use the amulet on the dagger to get the curved knife, then cut the carpet and lay it on the tent floor.
- Solve the puzzle to get the air blower, use it to collect the loofah, broken arrow, and ruby form, and go to the airship.
- Soak the loofah in oil, open the chest, read the note, and take the machine parts. Solve the puzzle to get the airship anchor. Repair the arrow, combine it with sandpaper and the bow, and move forward.
Shoot Branch and Assemble Mechanism
Shoot the branch, solve the slider puzzle, and take the waterskin. Use the waterskin on the flowers, collect the broken key, tweezers, and valve, then assemble the mechanism.
Resin Figurine and Ruby
Move forward, solve the puzzle to get the resin figurine, melt it into resin, combine it with powder to form the ruby, and go back. Use the ruby, solve the long sequence puzzle, and take the carnivorous plant.
Key Assembly and Nabia’s Camp
Return and use the plant on the web, take the glove and key fragment, and assemble the key. Go to Nabia’s camp, unlock the path, solve the key puzzle, and take the map. Collect magic shoes one of two and a bowl, use the bowl on the fire pit to get soot, and take the broken crossbow.
Open the backpack to take the book of flame, use it on the fire pit, solve the puzzle, and take the flat metal lid. Use it to collect cotton and magic shoes, two of two.
Use both shoes with the map and complete the random puzzle. Take labyrinth shards one of three, then two of three, then three of three by following the rune clues.
Diamond Ring and Ointment
Seal the gate with resin and shards, move forward, solve the puzzle, and save Nabia. Read the note, take the diamond ring and fibula, then collect the ointment and the labyrinth feather.
Combine the feather with oil and soot to get herbs and spell hints. Heal Nabia, complete the random puzzle, and receive the vial of liquid fire.
Return to the camp, brew the smoking kettle, repel the insects, and take the practice target. Move forward, place the target on the cactus, and solve the placement puzzle.
Take water from the oasis, a big shell, and glass, then create lenses and view the stars to get the star combination.
Use it to open the tube, take the scroll tube, solve the puzzle, and get the golden bracelet. Use it to collect spell hints and the embroidered scarf, then take the fan and pierced shield. Return to camp, solve the puzzle to earn bull horns, take the pouch of corks, and repair the shield.
Move forward, use the shield to take the final spell hint, activate the spellcasters, and take the floor plan. Use it to solve the tile puzzle and move forward. Select the option, read the note, take the mask and empty sack, fill it with sand, and use it on the hook.
Solve the puzzle to get the scroll, assemble it, and move forward. Select the option, take the jar and planks, one of two, use the fan to get gold powder, and take the moon stone. Combine the stone with oasis water to create the mask of illusions and use it.
Solve the face-matching puzzle, take the old sign and blue crystal, create blue flame, and activate the tablet.
Solve the puzzle to get explosives, clear the rubble, navigate the maze, and take the magic lamp. Give it to the genie, select the option, and go to the Petrified Caravan.
Take the broken amulet and lamp, collect the metal rod, repair the amulet, and go near Akiba Tower. Collect planks two of two and the trap, take coal, then collect nails, harp strings, and a shield. Repair the bridge, solve the button puzzle, and take metal hoops and candles, one of two.
Capture lightning in the jar, activate the painting, solve the puzzle to get a palm leaf, and return to the caravan.
Final Puzzle and Magic Lamp
Use coal to take the brick drawing, then go inside the tower. Use the palm leaf, read the book, take the incomplete figurine and harp strings two of two, and fill the oiler.
Final Assembly and Shield
Use the strings to take the spoon, oil the mechanism, take the keys, and unlock the door. Solve the button puzzle, read the diary, and go back. Solve the puzzle to get the metal basin, use it with the spoon to scare the bats, and take two candles out of two.
Candle Placement and Tower
Return near the tower, place the candles, solve the sequence, and take the tower banner and trident. Open the chest, take the bolt, and go to Sanctuary City. Solve the puzzle to get the stone egg, use it to take the puppeteer, and go to the Hall of Magical Marionettes.
Final Figurine Repair and Puzzle Solving
Use the puppeteer, solve the grid puzzle, and take the big feather and figurine part. Repair the figurine, use it to take the wooden handle, return to the tower, and solve the puzzle to get the golden statuette. Repair the barrel to take the paper flower and return to the city.
Final Symbol Puzzle and Ending
Use the flower, solve the symbol puzzle, and take the bas-relief fragment. Return to the tower, place it, read the records, and select the final option.
You have now completed this chapter of Hidden Portals 2: Chronicles of the Sunbound.


