
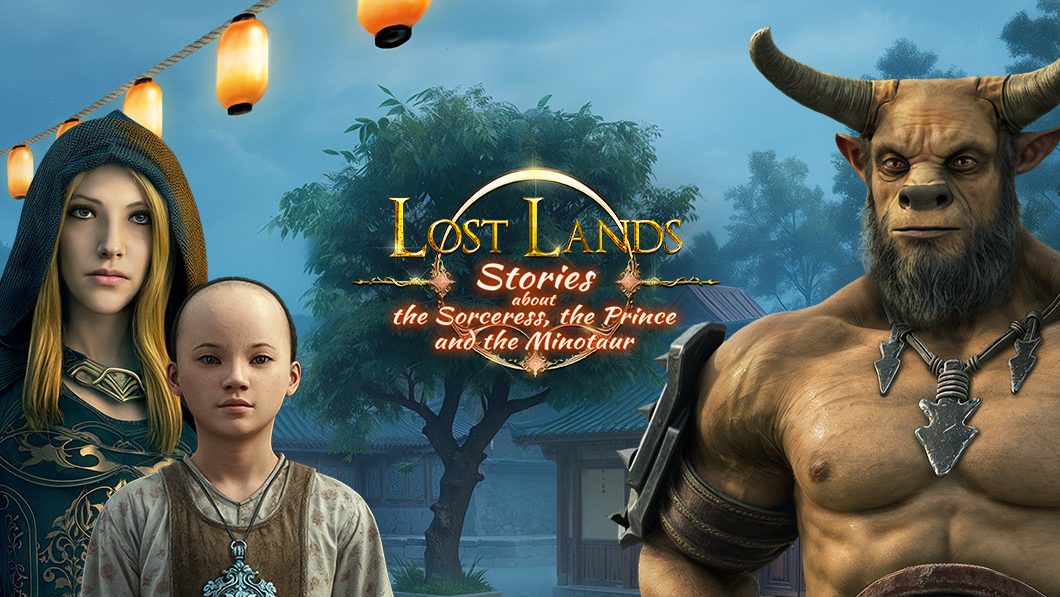
With the successful release of 10 games in the Lost Lands series, FIVE_BN Games has introduced the 11th installment a few weeks back with three chapters: Anomalous Event, Trials of the Big City, and Mountain of Challenges. This is not the end, as a bonus chapter is also featured, which may be unlocked once you complete the game. The primary genre is hidden object, and the gameplay consists of several elements like puzzle, adventure, storytelling, and more.
You get into the shoes of the protagonist and set yourself on an epic adventure, which may lead you to the construction of the Stronghold of Five Worlds. It includes plenty of mini-games and complicated quests. The graphics and the mechanics are identical to the series’ other games; however, the characters and the puzzles are completely different, as well as the scenarios. Completing puzzles isn’t an easy job as it requires lots of time and detective thinking; therefore, many players prefer readinga walkthrough to solve puzzles in Lost Lands 11.
Lost Lands 11 Walkthrough
The Foreman
First off, read the letter about the Guild and learn that Dudi the Hammer wrote it, then decide to find the construction foreman.
Collect manuscript 1 of 12 and grab the candles, then place the candles and light them with the pipe. Pick up the scrap, then rotate the golden leaves to align the patterns with the hint and finish the puzzle.
Obtain the quill, powder, and snowflake figurine, then talk to the Foreman to continue.
The Portal Well
Next, approach the portal well and prepare to activate it to reach the upper floors. Grab the crowbar and saw, then pry with the crowbar and pull free the handle and the first metal bunch.
Work the crowbar again, attach the handle, and clear the mechanism, then collect the candle and hold it up to reveal another scrap.
Solve the platform puzzle by finding the damaged spots and patching them with the correct shapes, then gather the two scraps and the shield figurine.
Combine the three scraps, assemble the image, obtain the drawing, and present it. Light the candle again, then apply the powder and quill to proceed.
The Missing Artifact
Then, talk to the Foreman again and collect the anchor figurine. Pick up the coins and cut with the saw, then offer the coins and receive the candelabrum.
Place the candelabrum and offer the coins again, move the ladder, gather the lockpicks, and move the ladder back. Grab the fire figurine and sun figurine, then place the fire, sun, and anchor figurines. Place the shield and snowflake figurines to open the next area.
The Pillar of Balance
After that, collect manuscript 2 of 12 and grab the feather figurine, then place it and collect the moon figurine.
- Place the moon figurine, pick the lock with the lockpicks, obtain the second metal bunch, and join both metal bunches together. Guide the warrior safely to the green flag while avoiding the Minotaur and the red flag, then remember the symbols on the stone.
- Pick up the sword figurine, place it, group the figurines into opposite pairs, then rotate the arrows to match the remembered symbols.
- Collect the Weights of Creation by opening each mechanism, swinging the axe and fitting the emblem when needed, solving the token order puzzle, and retrieving every weight.
- Wipe with the cloth, open the vase, turn the key, and claim the final weight, then place the cart of weights on the scale. Balance the scale so the numbers on both sides match exactly.
The Red Gates
Next, talk to Grandma and collect the key, then unlock the gate. Grab the knife and cut through the obstruction, then talk to the Cook. Obtain the lotus and manuscript 3 of 12, give the lotus to the Cook, and receive the recipe.
Grab the scoop and cauldron, remove the cloth from the cart, and collect the potato and carrot. Place the animal tokens following the earlier hints, then gather the maggots and open the recipe.
Add the potato and carrot and collect the bobber, then grab the hook and green onion. Scoop up rice, pick up the threads, add the rice, and obtain the egg.
Open the recipe and add the egg, rice, and green onion, then collect the kelp. Fill the cauldron and collect drinking water, cut bamboo with the knife, then collect all three shiitake mushrooms. Open the recipe and add the water and mushrooms.
Wrap the fish in kelp, click the bamboo, tie the threads to the hook, then bait the hook with maggots and attach the bobber to receive the fishing rod. Cast the rod and obtain the fish, open the recipe and add the fish to receive the ingredients. Add the ingredients, find the hidden items, and collect the fan.
Collect the rice, key, and ladle, then unlock the chest and gather the soy sauce. Gather the spices and wave the fan, then grab the skewer and pour water into the pots.
Put the egg into the water, pour in the soy sauce, stir with the ladle, and add the spices. Cut the egg, wrap the fish in kelp, collect the fish, chop the onion and mushrooms, chop the potato and carrot, and collect the vegetables.
Skewer and fry the fish, serve the fried fish, remove the fillet, add the vegetables and rice, and obtain the soup. Give the soup to Grandma, spend the coin, collect the gong, and strike it.
The Escape
Then, connect the dots to repeat the pattern, pick the locks, and open the mechanism. Collect the bunch of keys and wakizashi, close the guards, and obtain the red stone.
Unlock both locks, collect the stepladder, place the red stone, and climb up to gather the green stone and the note. Climb again and gather the blue stone, then place the blue and green stones and read the note.
Rotate the cryptex and collect the key, then collect the sake and unlock the door. Collect the yellow stone and spear, place the yellow stone, and cross the rope with the spear. Lower the ladder, spend the coin, collect the key parts, assemble the key, and open the way with the wakizashi.
Smoke and Mirrors
Next, collect the firework blueprint and poker, then gather the coal and add the threads to the blueprint. Grind the coal, nudge the stones into position, and gather the saltpeter and sulfur.
Collect the tube and add it to the blueprint, then collect the gong, strike it, and gather the copper coin. Spend the coin, scrape the metal to get shavings, and add them to the blueprint.
Add sulfur and saltpeter, weigh the substances, and collect the gunpowder. Add the gunpowder, pour the coal into the tube, pour in the gunpowder, splash in the sake, attach the threads, and collect the rocket. Launch the rocket, collect the burner, and ignite it.
The Stranger
Then, collect the shaped key and unlock the door, gather the wine, hammer, and nails, install the gear teeth, and secure them. Go down and collect the vial, gather the seal insert and duckweed, tap the beam with the hammer, and gather the board.
Collect the bucket of water and place the board, then melt the ice and collect the old key. Open the lock and collect the cage, gather the snake catcher and place the cage, then pour in the water and collect the hamster.
Pour the wine onto the duckweed, press the symbols, and collect the metal skull. Release the hamster, catch the snake, collect the venom, and inject it.
Press the duckweed, pour the venom and wine into the sprayer, add pollen, and collect the sprayer. Spray the mixture, strike with the wakizashi, crack the crystal with the hammer, and collect it.
Collect the key pendant, activate it with the crystal, and trigger it. Collect the potion vial and whip, then collect the metal spider and insert the metal skull.

Insert the seal and receive the spider key, then turn it and arrange the tokens correctly. Collect the crystal, collect the silk scarf, and drape both.
Set the third and fourth crystals from the ground with the scarf, then slice off the first and second spider legs with the wakizashi.
Drink the potion, collect the third leg, then place all three legs and separate the materials correctly. Collect manuscript 4 of 12.
The Young Prince
Finally, collect the glowing sphere and activate it, then place all animal plates into the wall by matching each shape and clearing obstacles.
Break the jugs, remove the web, open the lock, and place the spider plate. Collect the magic stabilizer and activate it, then balance the final scale so both sides are equal and restore stability.
Congratulations! You have completed Lost Lands 11. If you need quick help, see the table below or read FAQs. Do ask in comments if you have any questions.
Quick Table
| Chapter | Object | Description |
|---|---|---|
| The Foreman | Manuscript 1 of 12 | Found in the Foreman’s area. |
| Candles | Required for lighting during puzzles. | |
| Scrap | Used to complete puzzles. | |
| Golden Leaves | Part of a rotating puzzle. | |
| Quill | Needed for solving puzzles. | |
| Powder | Used with the quill in puzzle solutions. | |
| Snowflake Figurine | One of the figurines to be collected. | |
| The Portal Well | Crowbar | Used to pry open a mechanism. |
| Saw | Helps cut through obstructions. | |
| Metal Bunch | Two pieces needed to assemble. | |
| Candle | Used for revealing hidden items. | |
| Shield Figurine | Collect for the next section of the game. | |
| Scrap | Part of the puzzle assembly. | |
| The Missing Artifact | Anchor Figurine | Required for puzzle progress. |
| Coins | Needed to be exchanged for items. | |
| Candelabrum | Obtain after offering the coins. | |
| Fire Figurine | Part of the figurine puzzle. | |
| Sun Figurine | Another figurine for puzzle solutions. | |
| The Pillar of Balance | Manuscript 2 of 12 | Found in the Pillar of Balance chapter. |
| Feather Figurine | One of the figurines to be collected. | |
| Moon Figurine | Another figurine to gather. | |
| Lockpicks | Used to unlock areas. | |
| Sword Figurine | Required for the figurine puzzle. | |
| Weights of Creation | Used to balance the scale. | |
| Cloth | Wipe objects and clean up puzzles. | |
| The Red Gates | Key | Used to unlock a gate. |
| Knife | Helps cut through an obstruction. | |
| Lotus | Given to the Cook in exchange for a recipe. | |
| Manuscript 3 of 12 | Found while helping the Cook. | |
| Scoop | Part of the ingredient collection. | |
| Cauldron | Used for mixing ingredients. | |
| Potato | One of the ingredients for the soup. | |
| Carrot | Another soup ingredient. | |
| Animal Tokens | Used to solve a puzzle. | |
| Bobber | Part of the fishing puzzle. | |
| Hook | Used to set up the fishing rod. | |
| Green Onion | Part of the recipe. | |
| Threads | Used in cooking and puzzle mechanics. | |
| Egg | Another key ingredient for the soup. | |
| Kelp | Used to wrap the fish. | |
| Mushrooms | Part of the soup ingredients. | |
| Skewer | Used to prepare food for the soup. | |
| The Escape | Bunch of Keys | Unlocks various mechanisms. |
| Wakizashi | Used to unlock gates and objects. | |
| Red Stone | A key puzzle piece. | |
| Stepladder | Helps you climb to higher areas. | |
| Green Stone | Another puzzle item. | |
| Blue Stone | Part of the stone puzzle. | |
| Cryptex | A rotating puzzle box to unlock. | |
| Sake | Part of a key puzzle. | |
| Yellow Stone | Required for another puzzle section. | |
| Spear | Helps cross obstacles with a rope. | |
| Key Parts | Needed to assemble a key. | |
| Smoke and Mirrors | Firework Blueprint | Helps craft fireworks. |
| Poker | Used for puzzle assembly. | |
| Coal | Part of the firework assembly. | |
| Saltpeter | Part of the firework ingredients. | |
| Sulfur | Used to make gunpowder. | |
| Tube | For assembling the rocket. | |
| Gong | Used to trigger events. | |
| Copper Coin | Part of the currency system. | |
| Metal Shavings | Used for firework crafting. | |
| The Stranger | Shaped Key | Unlocks the next area. |
| Hammer | Helps with various mechanical tasks. | |
| Nails | Used to secure parts of mechanisms. | |
| Gear Teeth | Installed into a mechanism. | |
| Vial | Used in potion crafting. | |
| Seal Insert | Part of a puzzle mechanism. | |
| Duckweed | Part of a potion recipe. | |
| Board | Used to solve puzzles. | |
| Bucket of Water | Helps with various tasks. | |
| Old Key | Unlocks certain locks. | |
| Cage | Used to catch a snake. | |
| Snake Catcher | Needed to capture a snake. | |
| Hamster | Another animal involved in the puzzle. | |
| Venom | Collected from the snake. | |
| Metal Skull | Part of a mechanism to be used. | |
| The Young Prince | Glowing Sphere | Required to unlock the final puzzles. |
| Animal Plates | Needed to be placed on the wall in a puzzle. | |
| Magic Stabilizer | Activates the final portion of the chapter. |
FAQs
To find the foreman, start by reading the letter about the Guild. It’s written by Dudi the Hammer. Once you have the letter, look for the foreman to continue with the quest.
In the Portal Well area, you need to identify the damaged spots on the platform and repair them by matching the correct shapes. Once you’ve completed this, you’ll unlock the next step in the puzzle.
Manuscript 1 is located in the Foreman’s area. Be sure to grab it along with the candles, as you’ll need them for a later puzzle.
To balance the scale, you’ll need to gather the Weights of Creation and place them on the scale. Adjust them so the numbers on both sides match exactly. This unlocks the next section of the game.
To make the soup, gather ingredients like potatoes, carrots, mushrooms, rice, fish, and spices. Follow the recipe steps, fry the fish, and add the vegetables and rice to complete the dish. Give the soup to Grandma to progress.
To unlock the door, you need to collect the shaped key, gather some materials (like wine, hammer, and nails), and install gear teeth. After that, proceed to solve other puzzles and unlock the door.
In this chapter, gather materials like sulfur, saltpeter, and coal to create gunpowder. Add these to the blueprint, then assemble the rocket. Once you have it, launch the rocket to collect the burner and ignite it.
To catch the snake, place the cage in the right spot and pour water into it. After catching the snake, collect its venom and inject it into the required items to move forward in the game.
After obtaining the spider key, use it to unlock and activate mechanisms. You will need to combine it with the metal skull and other items to complete the sequence of actions in this chapter.
In The Young Prince chapter, you’ll need to match animal shapes and place them on the wall correctly. Afterward, break the jugs and clear webs to progress. The key is to ensure each animal shape fits properly before moving forward.


