Hollow Knight: Silksong: How to Beat Moorwing in Greymoor
Moorwing guards a stretch of Greymoor with two brutal attack phases — here's how to dodge its discs, claws and charges to earn the Beast Shard.
Moorwing is the first boss in Greymoor that actually forces you to learn Hornet's dodge timing instead of button-mashing through it. It hits hard, it covers ground fast, and its enrage phase adds a second attack you won't see coming the first time. Here's exactly where to find it, what to bring, and how to close out both phases without burning through your Silk reserves.
01Where to Find Moorwing in Greymoor
Moorwing lives in Greymoor, off to the west of the area near the pathway that eventually connects through to Bellhart. The arena is easy to spot: a moss-choked clearing that opens up wider than the corridors around it, with a bench a short run back the way you came. If you've been following the main route through Greymoor and haven't ducked down any side paths, you'll likely stumble into the fight before you're fully geared for it, so it's worth backtracking to the bench first.
There's also an NPC ally camped near a tower structure close to the arena, guarding a nearby foe. Clear that enemy first and the ally will join you for the Moorwing fight itself, which takes real pressure off phase two — the ally chips away at Moorwing's health between your own openings and occasionally draws a charge that would otherwise be aimed at you.
Greymoor is a large, vertical area, and it's easy to end up in Moorwing's clearing from more than one direction depending on how much of the map you've already opened up. If the arena feels unfamiliar or you're not sure you've explored the tower structure yet, take the slower route back through the bench first rather than diving straight into the fight blind — Moorwing's clearing doesn't have an easy retreat path once the fight starts.
02Gear Up Before You Walk In
Moorwing rewards ranged pressure over standing toe-to-toe with it. If you've already picked up Silkspear near Mosshome, equip it — throwing the needle to pierce Moorwing mid-charge is one of the safest ways to chip its health without eating a claw swipe. Silkspear deals three times your normal needle damage on a hit, but it locks you out of a regular needle attack until the spear returns, so throw it into an opening rather than on reaction to an attack you're still reading.
Hornet's Silk system means every hit you land on the way in also refills the resource you'll spend healing later in the fight, so don't hoard it. Go into the arena with a full Silk bar if you can manage it — you'll want at least one full heal in reserve for the transition into phase two, since the scream that triggers the enrage doesn't give you much warning to top up beforehand.
On the Crest side, whichever setup you're running for attack speed will matter more here than raw range — Moorwing's openings are short, and a slower swing pattern means fewer punishes per opening. If you're still early in Greymoor and haven't unlocked much of your kit, that's fine; the fight is built to be beatable on a starting loadout, just slower and riskier. What matters more than any specific Tool is spacing discipline: Moorwing punishes players who stand still to trade hits far more than it punishes cautious, patient play.
03Phase One: Reading the Charges and Discs
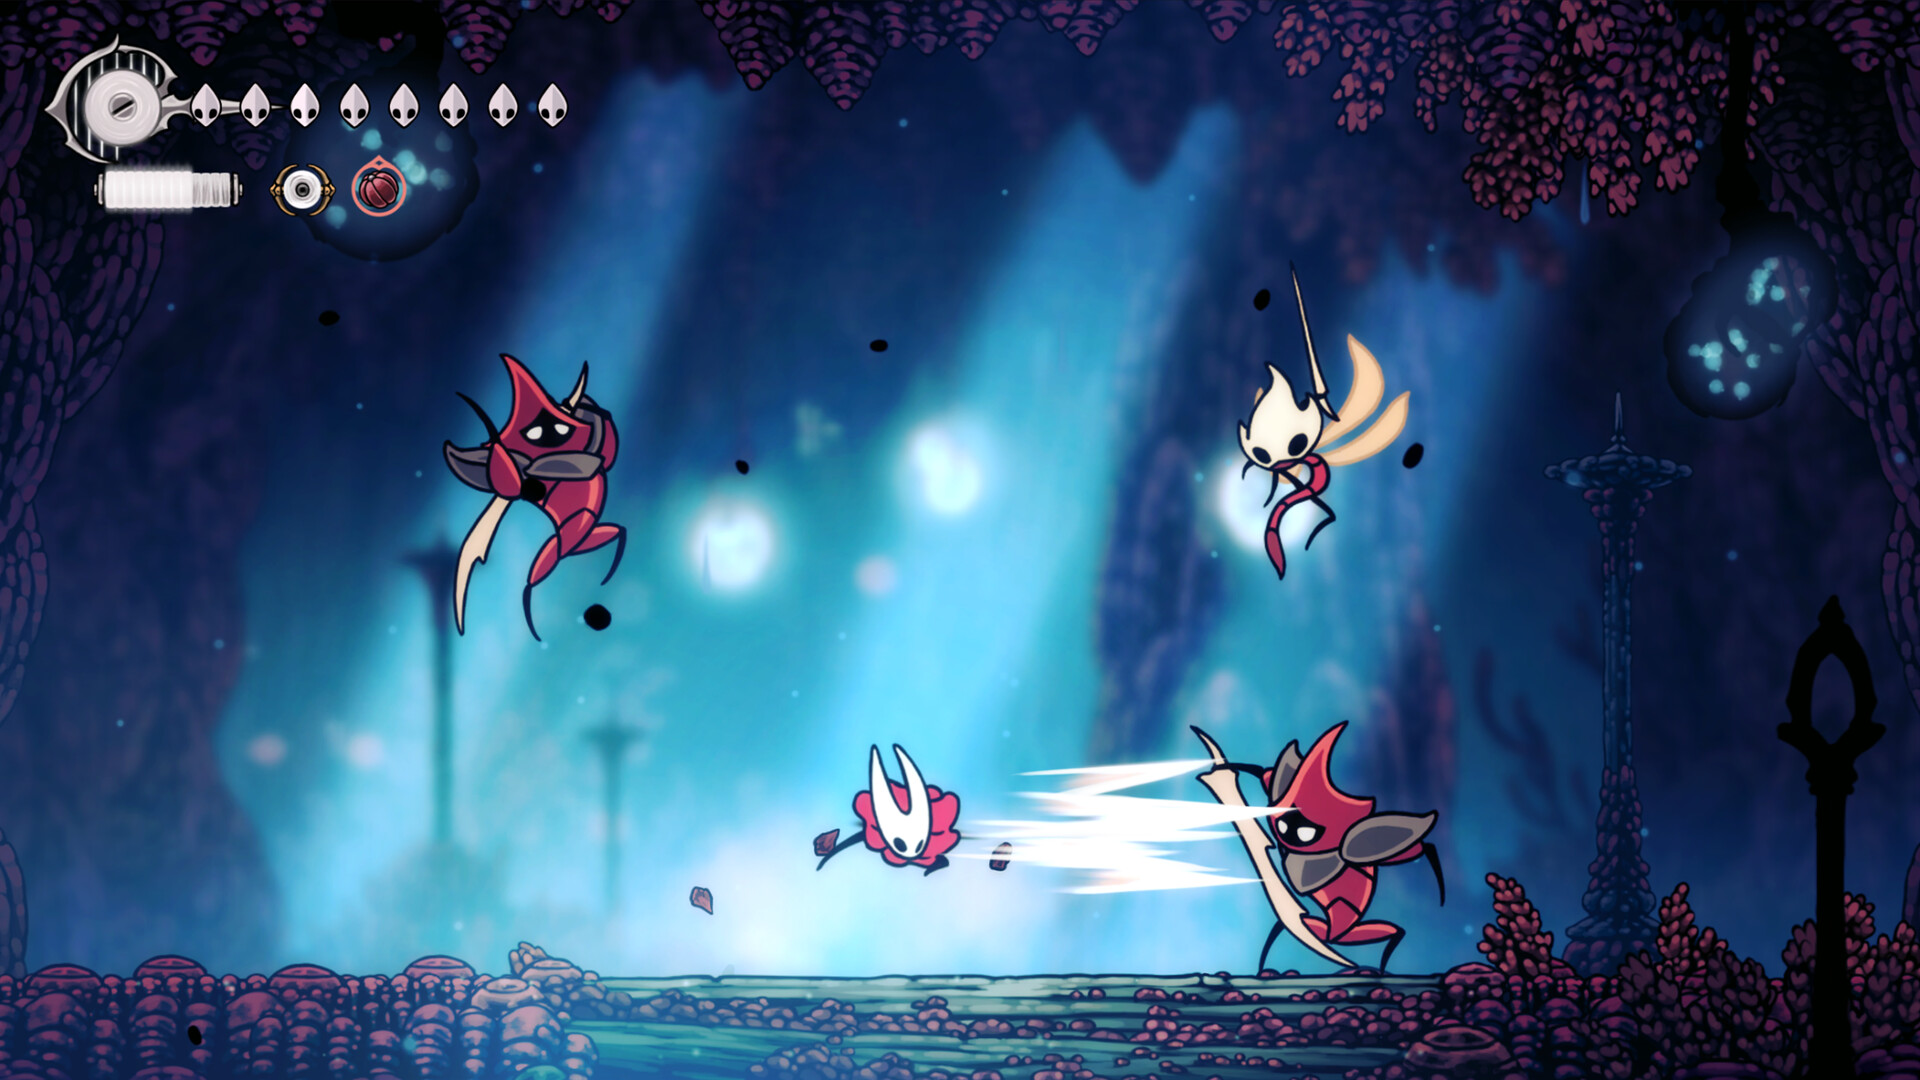
Moorwing opens with a straightforward kit: charging lunges across the arena floor, circular disc projectiles thrown from range, and a melee claw swipe when you get in close. None of these are instant — every attack has a visible wind-up, which is your cue to commit to a dodge rather than a block.
- Charges: time a jump over the lunge rather than dashing backward. Jumping keeps you close enough to punish the landing recovery with a needle combo or a Silkspear throw.
- Discs: these travel in a straight line and are easiest to avoid by staying underneath Moorwing's altitude rather than running along the ground trying to out-space them.
- Claw swipe: the attack comes from above and telegraphs with a downward motion. Getting underneath it and striking upward hits the vulnerable front of the creature and avoids the hitbox entirely.
Treat phase one as a rhythm you're learning, not a race. Moorwing doesn't chain attacks back-to-back immediately, so there's a real window after each move to land two or three hits before resetting to a safe distance. Resist the urge to greed for a fourth hit — that's almost always when a charge you didn't see catches you mid-recovery.
04Why This Fight Trips People Up
Moorwing is often the first boss in Greymoor where players who breezed through the game's opening hours suddenly stop making progress. Part of that is by design — Hollow Knight: Silksong has drawn a genuinely mixed response from players specifically over how punishing its bosses and death runbacks are, and Moorwing sits right at the point in Greymoor where the difficulty curve visibly steepens for the first time.
Most deaths here come from two habits carried over from earlier, easier fights: trying to force damage during Moorwing's short recovery windows instead of waiting for a full opening, and misjudging the disc projectiles' travel line because they move faster than they look. Both are fixable within a few attempts once you know to expect them, which is really what separates a two-minute fight from a ten-attempt one.
05Phase Two: What Changes When It Enrages
Once Moorwing's health drops far enough, it lets out a scream and the fight changes shape. The core moves are still there, but two things get added: disc throws now follow immediately after a charge instead of being a separate attack, and Moorwing gains a reverse disc kicked out from its feet that splits into several smaller projectiles as it travels.
The split discs are the real threat in this phase — they cover more of the arena than phase one's attacks, so the "stay underneath" trick from before gets riskier. Prioritize horizontal spacing over vertical positioning once the scream triggers, and be ready to dash away entirely rather than trying to punish through the enrage's opening flurry.
The enrage is a move-set change, not a second wind for Moorwing's health — if you've already been landing hits consistently in phase one, you're usually close to the finish once the scream triggers. Play phase two purely defensively for the first few reps rather than trying to force damage. Learn where the split discs land before you try to squeeze in extra hits between them; the fight rewards patience here more than anywhere else.

06Step-by-Step Kill Sequence
If you want a clean run once you know the patterns, follow this order. It assumes you've cleared the nearby enemy to recruit the ally and have Silkspear or an equivalent ranged Tool equipped.
How to Beat Moorwing, Step by Step
- 1Before heading into Moorwing's arena, defeat the enemy guarding the ally near the tower structure. Recruiting it takes real pressure off phase two.2 min
- 2Rest at the bench a short run back from the arena to bank Silk and start the fight with a full bar and a reserve heal.1 min
- 3Jump over charges to punish the landing recovery, stay underneath disc throws, and strike upward into claw swipes from below.2 min
- 4Don't greed for extra damage after Moorwing's short recovery windows close — back off and wait for the next telegraph.2 min
- 5Once Moorwing enrages, prioritize horizontal spacing over the phase-one 'stay underneath' trick, since the new split discs cover more ground.1 min
- 6Close out the fight once you've weathered a couple of enrage patterns — consistent phase-one damage carries over, so it rarely takes long.1 min
07Skip It, Fight It, or Come Back Later
You don't have to fight Moorwing at all. Completing the Lost Fleas quest line unlocks travel through the Flea Caravan, which routes around the arena entirely — useful if you're low on Silk and just need to keep moving toward Bellhart. That said, skipping it means skipping the reward: beating Moorwing drops a Beast Shard, a crafting material used later for Crest upgrades, so it's worth the fight if you're anywhere close to full health when you walk in.
If it's beating you badly, there's no shame in the Caravan detour and circling back once you've got more Silk capacity and a second Tool slot unlocked. Coming back a bit later with even one more Mask or Spool upgrade makes a bigger difference to this fight than most, since Moorwing's damage output is high enough that a single extra hit of padding can turn a two-hit punish window into a much safer one.
Whichever route you take, it's worth checking the game's Wikipedia entry for a wider sense of where Greymoor sits in Silksong's difficulty curve — reviewers were split on whether fights like this one add character to the game or just pad out the runtime with runbacks, and knowing that going in can make a rough attempt feel less like you're doing something wrong.
Patch 5, the current build on PC (version 1.0.30000), didn't touch Moorwing directly, but it's worth reading through the patch notes before you fight anyway — Team Cherry used that update to quietly tune down other late-game bosses like Last Judge, and small damage adjustments like that can change a fight's timing without an obvious announcement.
FAQ
Where exactly is Moorwing in Hollow Knight: Silksong?
Moorwing is in Greymoor, to the west of the main path that connects toward Bellhart, in a moss-covered clearing wider than the surrounding corridors. There's a bench a short run back if you need to restock before the fight.
Can I skip Moorwing?
Yes. Completing the Lost Fleas quest line unlocks the Flea Caravan, which routes around Moorwing's arena entirely. Taking that route means missing the fight's reward.
What does Moorwing drop when you beat it?
Beating Moorwing rewards a Beast Shard, a crafting material used later for Crest upgrades.
What's the safest way to deal damage without getting hit?
Silkspear, unlocked near Mosshome, lets you pierce Moorwing from range during its charge recovery for three times normal needle damage. Getting underneath its claw swipe and striking upward also lands a hit while avoiding the hitbox.
Does Patch 5 change anything about the Moorwing fight?
No. Patch 5 (version 1.0.30000) didn't touch Moorwing directly — it focused on translation updates, a new dithering option in video settings, and balance tweaks to other late-game bosses like Last Judge.
Official resources

Jonas runs the guides desk at Tutorial.Games. He replays every route, build and boss strategy on the current patch before it goes up, and re-checks it when the developer ships a balance update. Soulslikes, co-op action games and anything with a build planner.